Living in Palm Beach County means enjoying the sunshine, but it also means dealing with high humidity and the constant threat of storm season—two major risks for hardwood floors. A simple roof leak or appliance malfunction can quickly become a serious issue in our climate, leading to cupping, buckling, and mold. This guide is written specifically for Florida homeowners like you. We’ll cover the essential steps for a successful hardwood floor water damage repair, from immediate actions after a storm to long-term strategies for controlling indoor humidity. Protecting your investment means understanding the unique challenges of our environment and having a solid plan ready.
Key Takeaways
- Act Fast at the First Sign of Trouble: Your senses are your best first defense—look for discoloration, feel for warping, and notice any musty smells. Once you spot a problem, immediately stop the water source, remove standing water, and document everything with photos before starting the drying process.
- Distinguish Between a DIY Fix and a Professional Job: Minor, quickly-cleaned spills can often be a DIY project. However, widespread issues like buckling boards, a soft subfloor, or any sign of mold are clear signals that you need professional help to prevent long-term structural damage.
- Make Prevention a Part of Your Routine: After a repair, protect your investment by making prevention a habit. Regularly inspect appliance hoses, use dehumidifiers to control indoor humidity, and apply fresh caulk around windows and doors to stop moisture before it can cause damage.
How to Spot Water Damage on Hardwood Floors
Finding a puddle on your beautiful hardwood floors can be alarming, but catching the problem early is the key to preventing long-term issues. Water damage isn’t always as obvious as a mini-lake in your living room; sometimes, the signs are much more subtle. Knowing what to look for can help you act quickly and save your floors from serious harm. Think of it as a quick inspection—your senses are your best tools for the job. By paying close attention to how your floors look, feel, and even smell, you can identify water damage before it becomes a major restoration project.
What to Look (and Smell) For
Your nose is often the first to know when something is wrong. A persistent, musty smell that you can’t seem to air out is a classic sign of hidden moisture and potential mold growth. Visually, scan your floors for any dark spots or stains that have appeared on the wood. These discolorations mean water has soaked into the boards. You should also keep an eye out for any visible mold, which can look like small black or green spots, especially along the edges of the boards or near baseboards. Finally, walk across the area and feel for any loose floorboards or nails that have popped up, as this can indicate the wood underneath is swelling.
Check for Warping, Cupping, and Buckling
Water causes wood to swell, and this can change the shape of your floorboards in a few distinct ways. Cupping is when the edges of a board are higher than its center, giving the floor a wavy, uneven appearance. This happens when the bottom of the wood absorbs more moisture than the top. The opposite of this is crowning, where the middle of the board swells and rises higher than the edges. The most severe sign is buckling, which is when the floorboards lift completely off the subfloor. While minor cupping can sometimes be reversed with proper drying, buckling is a clear signal of significant damage that needs immediate attention from a water damage professional.
Use a Moisture Meter to Confirm
While your eyes and nose can point you to a problem, a moisture meter gives you definitive proof. This tool measures the percentage of water within the wood, taking all the guesswork out of your assessment. You can find them at most home improvement stores. Simply press the meter’s prongs into the wood in the affected area and compare the reading to a dry, undamaged section of your floor. A significantly higher reading confirms that moisture is trapped inside the boards. Knowing the exact moisture content helps determine the extent of the damage and is the first step in creating an effective drying and repair plan.
What to Do Immediately After Finding Water Damage
Finding water pooling on your beautiful hardwood floors can send anyone into a panic. But take a deep breath—what you do in the next few hours is critical and can make a huge difference in the extent of the damage. Acting fast helps prevent long-term issues like mold growth and structural problems. While you wait for professional help to arrive, there are four immediate steps you can take to get the situation under control. Think of this as your emergency action plan. Following these steps will help protect your home and make the restoration process smoother for everyone involved.
Stop the Source and Remove Standing Water
First things first, you need to stop more water from coming in. Try to identify the source of the leak—is it a burst pipe, a faulty appliance, or something else? If you can, shut off the water supply to that specific area or the main valve to your home. Once the flow has stopped, your next job is to get rid of any standing water. A wet-dry shop vacuum is your best tool for this, but mops and old towels will also work in a pinch. The goal is to remove as much surface water as you can, as quickly as possible, to prevent it from seeping deeper into the wood and subfloor.
Document Everything for Your Records
Before you move anything or start any major cleanup, grab your phone and become a detective. Take plenty of photos and videos of the damage from every possible angle. Capture the source of the water, the entire affected area, and close-ups of the damaged flooring. Don’t forget to document any personal belongings that were damaged, too. This evidence is incredibly important for your homeowner’s insurance claim. Your insurer will want to see the extent of the damage as it was when you found it, and having clear visual records will make the claims process much easier to handle down the line.
Start the Drying Process
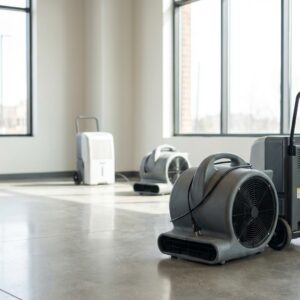
Getting rid of standing water is just the beginning. Now, you need to focus on drying out the wood and the air. Open up windows and doors to get air circulating, as long as the humidity outside isn’t high. Set up fans—box fans, oscillating fans, any kind you have—and aim them directly at the wet floor. If you own a dehumidifier, now is its time to shine. Place it in the middle of the affected room and let it run continuously. This initial drying process helps pull moisture from the wood and the subfloor, but keep in mind it can take several days.
Contact Your Insurance Provider
With the immediate situation under control, it’s time to make a few important calls. Your first one should be to your insurance agent. Let them know what happened and ask about your coverage for water damage. They can explain the next steps for filing a claim and what documentation they’ll need from you. Your second call should be to a professional restoration company. While you’ve taken great first steps, a team of experts has the specialized equipment to fully dry your floors, address potential mold growth, and handle complex repairs. We can work directly with your insurance company to make the process as seamless as possible.
How to Assess the Severity of the Damage
After you’ve stopped the leak and cleared the standing water, it’s time to play detective. Understanding the extent of the damage is crucial because it dictates your next steps. Some minor issues can be handled on your own, but more significant problems often require a professional touch to prevent long-term structural issues and mold growth. A careful assessment will help you decide the best path forward for your home and your floors. This evaluation will also give you a clearer picture when you contact your insurance provider.
Identify the Type of Water Damage
First, figure out where the water came from. Was it a clean leak from a supply line, or something more concerning like a dishwasher overflow or a backed-up drain? Water damage is often categorized into three types: clean, gray, and black water. A leak from a broken pipe is typically clean water, while an overflow from a washing machine is gray water containing detergents. Black water, from sources like sewage or floodwaters, is a serious health hazard. Knowing the source helps you understand the potential contamination risks and the necessary steps for safe cleanup.
Test the Floor’s Stability
Now, let’s check the structural integrity. Gently press down on the affected floorboards. Do they feel soft, spongy, or bouncy? If so, that’s a red flag that the water has soaked through to the subfloor. A wet or weakened subfloor is a serious problem that can compromise the entire structure of your flooring system. If you notice any give or softness, the subfloor will need to be thoroughly dried, and any damaged sections may need to be replaced. This is often where a DIY project turns into a job for the pros, as subfloor repair requires specialized tools and expertise.
Look for Hidden Warning Signs
Water damage isn’t always obvious. You need to look for subtle clues that point to a bigger problem. Pay attention to a persistent musty smell, which is a classic sign of hidden moisture and potential mold. Visually inspect the boards for changes in shape—are they rising in the middle (crowning) or are the edges lifting (cupping)? Dark spots or stains can indicate that water has been sitting for a while. Also, check if any boards are lifting completely off the subfloor (buckling) or if nails seem loose. Any visible signs of mold, like black or green spots, mean you need to act quickly to address the contamination.
Understand What Influences Repair Costs
The cost of repairs can vary widely, and a few key factors are at play. The most significant one is time. Water can cause major damage in less than 24 hours, so the faster you act, the better your chances of saving the floor and keeping costs down. The second factor is the extent of the damage. Repairing a small, contained section can sometimes be more complex than replacing a larger area, especially when it comes to perfectly matching the color and finish of the existing wood. The type of water and the presence of mold will also impact the final bill, as they require more intensive remediation efforts.
A Guide to DIY Repair
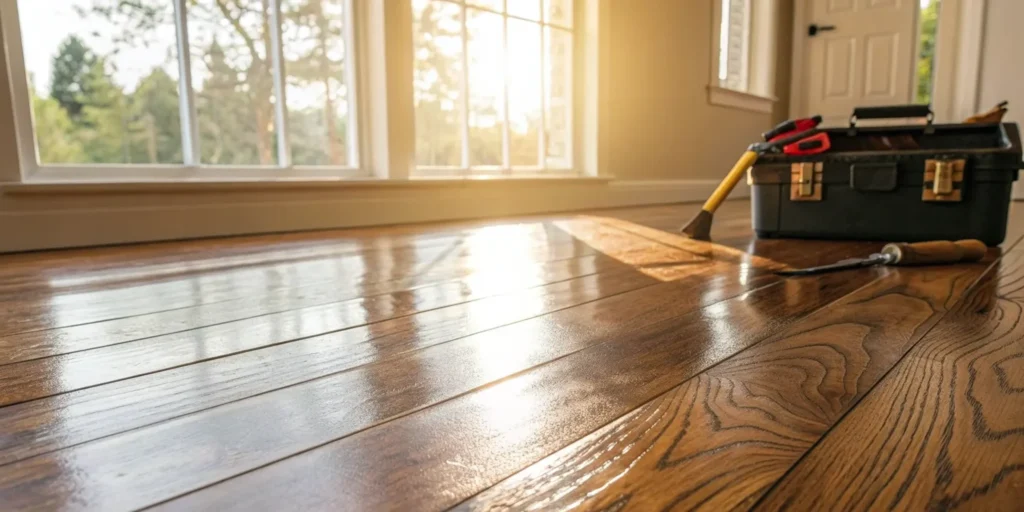
If you’ve assessed the damage and feel confident tackling the repair yourself, it’s time to get to work. A successful DIY project hinges on having the right approach and a lot of patience. Remember, the goal is to restore your floor’s beauty and function without causing further issues. This guide will walk you through the essential steps, from gathering your tools to the final finishing touches. Keep in mind that some stages, particularly sanding and refinishing, require a delicate touch that often comes with professional experience. While it can be rewarding to handle repairs on your own, it’s also important to know when a problem is beyond a simple fix. Taking on too much can sometimes lead to more complex and costly problems down the road, so proceed with a clear understanding of the scope of the work.
The Tools and Materials You’ll Need
Before you begin, gather everything you’ll need to avoid stopping mid-project. Your basic toolkit should include a wet-dry vacuum, high-powered fans, a dehumidifier, a pry bar, a hammer, and safety gear like gloves and goggles. One of the first things you’ll have to do is check the condition of the wood beneath your hardwood floor, known as the subfloor. You might need to carefully lift a few damaged floorboards to inspect it. If the subfloor feels soft, is still wet, or shows signs of mold, it must be dried completely and any damaged sections will need to be replaced before you can proceed.
How to Clean and Sanitize the Surface
Once the area is dry, your next step is to clean and sanitize the floorboards. Start by gently scrubbing away any lingering mud or dirt with a soft-bristled brush. For sanitizing, you can use a mild cleaner mixed with a small amount of bleach to kill any remaining bacteria and help prevent mold growth. Be careful not to oversaturate the wood. After cleaning, it’s crucial to rinse the surface with a damp cloth and dry it thoroughly. If you discover significant mold during this process, it’s best to stop and call for professional mold removal to ensure it’s handled safely and effectively before you continue.
Steps for Sanding and Refinishing
After the wood is completely clean and dry, you can move on to sanding and refinishing. This is the step that restores the smooth, beautiful finish to your hardwood. You’ll need to sand the affected area to remove the old finish and smooth out any minor imperfections caused by the water. This process creates a lot of dust, so be sure to seal off the room and wear a mask. Once sanded, you can apply a new stain to match the rest of your floor, followed by several coats of a protective sealant. Honestly, achieving a seamless blend with the existing floor is very difficult, which is why many homeowners choose to hire a professional for this stage.
Drying Requirements and Timelines
Patience is key when it comes to drying water-damaged hardwood. You have two main options. The fastest method is to hire a restoration company that uses powerful, specialized dehumidifiers and air movers to dry the floors quickly and thoroughly. This is often covered by home insurance and is the most effective way to prevent secondary damage like mold. The slower method is to let the wood air-dry naturally. This can take anywhere from two to twelve months, depending on the extent of the damage and the humidity in your home. You can aid the process by running fans and small dehumidifiers, but it’s a long wait with no guarantee of perfect results.
How the Professionals Handle Restoration
Sometimes, a little DIY spirit is all you need. But when it comes to significant water damage on hardwood floors, calling in a professional team is the safest and most effective path forward. Experts bring specialized equipment, years of experience, and a systematic approach that ensures every layer of damage is addressed, from the surface finish down to the subfloor. They can spot hidden issues you might miss and have the tools to perform complex repairs that restore not just the look of your floor, but its structural integrity and safety. Understanding their process can help you know what to expect and why their expertise is so valuable.
When to Call in the Experts
If you see your floorboards buckling, crowning (lifting up in the middle), or warping, it’s time to call for help. These are signs of severe, widespread moisture issues that surface-level fixes can’t solve. A professional assessment is also crucial if you suspect mold growth. Professionals use moisture meters and thermal imaging cameras to find the full extent of the water damage, which often spreads far beyond what’s visible. They have the heavy-duty drying equipment and technical knowledge to handle major problems correctly, preventing long-term structural damage and ensuring your home remains healthy and safe.
The Board Replacement Process
For floors with localized but deep damage, professionals will often replace the affected boards. This isn’t as simple as just pulling out the old wood. Technicians carefully pry up the damaged planks, taking great care not to harm the surrounding boards or the delicate tongue-and-groove connections. Once the bad boards are out, they install new ones of the same wood species and dimensions. The final, crucial step is to sand and refinish the repaired area, expertly blending the new boards with the old to create a seamless, uniform appearance across the entire floor.
Addressing Subfloor Damage
What lies beneath your hardwood is just as important as the surface you see. Water can easily seep through the floorboards and saturate the subfloor—the structural layer underneath. A damp subfloor can lead to mold, rot, and instability. Professionals always inspect the subfloor by removing a few damaged boards to check for moisture. If the subfloor is wet, soft, or shows signs of mold, it must be thoroughly dried. In some cases, damaged sections of the subfloor may need to be completely replaced to provide a stable and safe foundation for your hardwood.
Proper Mold Remediation
Where there’s water damage, there’s often mold. It can grow on the underside of your floorboards and across the subfloor, releasing spores that can impact your home’s air quality. Simply covering it up with new flooring is a recipe for future problems. A professional team will perform mold remediation to safely contain and remove all traces of mold before any repairs begin. This process ensures the entire area is clean, sanitized, and safe for your family, protecting both your health and your investment in your home.
Achieving a Perfect Color Match and Finish
One of the biggest challenges in repairing hardwood floors is making the new boards match the old ones. Wood’s color changes over time due to sun exposure and wear, and manufacturers may discontinue specific styles. Finding a perfect replacement plank can be tricky. Professionals have an advantage here. They have access to a wide network of suppliers and possess the skills to custom-stain and finish new boards to perfectly match the color and sheen of your existing floor. This attention to detail is what makes a professional repair virtually invisible.
Common Repair Hurdles and How to Clear Them
Repairing water-damaged hardwood can feel like a straightforward project, but a few common roadblocks can pop up along the way. Knowing what to expect helps you prepare for these challenges and make smart decisions about your repair strategy. From dealing with widespread damage to finding that perfect wood match, here’s how you can clear some of the most frequent hurdles you might face. Being aware of these potential issues is the first step toward a successful and lasting repair that restores the beauty of your floors.
Tackling Extensive Damage
Sometimes, the problem is bigger than a simple DIY fix. If you see severe issues like buckling, crowning, or significant mold growth, it’s a clear sign to call for backup. When the damage is this extensive, professionals have the specialized tools and knowledge to handle the job safely and effectively. They can assess the structural integrity of your subfloor, contain mold spores, and use industrial-grade equipment to dry everything properly. Trying to manage a large-scale repair on your own can often lead to bigger problems down the road, so don’t hesitate to get an expert opinion when you feel out of your depth.
Matching Your Existing Flooring
One of the trickiest parts of a hardwood floor repair is finding replacement boards that blend seamlessly with your existing floor. This can be especially challenging if your floors were installed several years ago. Manufacturers often discontinue specific styles, colors, and plank widths, which can make finding replacement wood feel like a treasure hunt. A professional restoration company often has access to a wider network of suppliers and the expertise to stain and finish new boards to achieve a near-perfect match, ensuring your repair is practically invisible.
Controlling Humidity Levels
Your work isn’t over once the floors are dry. In a humid climate like ours in Palm Beach County, managing indoor moisture is crucial for preventing future problems. High humidity can cause wood to swell, leading to cupping or buckling all over again. To keep your floors stable, use dehumidifiers in any areas that feel damp and make sure your home has good airflow. Maintaining balanced humidity levels is a non-negotiable step for the long-term health of your hardwood floors, protecting your investment and preventing a repeat of the damage.
Mistakes to Avoid
In the rush to fix your floors, it’s easy to make a critical mistake. One of the biggest errors is sanding the floor while it’s still wet and cupped. It might seem like you’re flattening the surface, but you’re setting yourself up for a bigger issue. As the wood fully dries, the boards will “crown,” meaning the center of each plank will be higher than the edges. This happens because you sanded the high, swollen edges down when they were wet. Always wait until the wood is completely dry before you even think about sanding. Patience here will save you from a much more complicated and costly hardwood floor repair.
How to Prevent Future Water Damage
After going through the effort of repairing your hardwood floors, the last thing you want is a repeat performance. Taking proactive steps to protect your investment is the best way to avoid future headaches and costly repairs. Prevention is all about being mindful of potential water sources and creating a home environment where your beautiful floors can thrive. By building a few simple habits and checks into your routine, you can significantly reduce the risk of water damage and keep your floors looking their best for years to come.
Effective Waterproofing Solutions
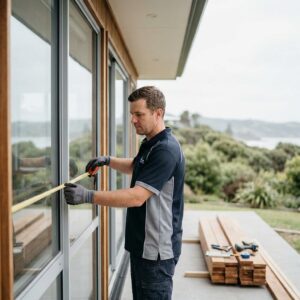
You don’t need a major renovation to add a layer of protection to your floors. Simple, strategic waterproofing can make a huge difference. Start by placing high-quality mats or rugs at all entryways to catch water from wet shoes, especially during Florida’s rainy season. Do the same in other high-risk areas, like under sinks, near the dishwasher, and beneath your pet’s water bowl. For a more robust defense, inspect the seals around your windows, doors, and the base of your showers. Applying fresh caulk to any gaps can prevent water from seeping in and reaching your subfloor. These small waterproofing measures are easy weekend projects that offer long-term peace of mind.
Key Areas for Regular Inspections
Catching a problem early is key to preventing a catastrophe. Make it a habit to regularly inspect areas where leaks are most likely to occur. Check the plumbing under your sinks and behind the toilet for any signs of drips or moisture. Don’t forget to look at the hoses connected to your washing machine, dishwasher, and refrigerator ice maker, as these can wear out over time. It’s also a great idea to review your homeowner’s insurance policy. Understanding what is and isn’t covered before you have a problem can save you from major financial stress. Many policies cover water damage from sudden and accidental events, but it’s always best to confirm the details.
Tips for Managing Humidity
In a humid climate like Palm Beach County, moisture in the air can be just as damaging to hardwood as a direct leak. Wood naturally expands and contracts with changes in humidity, and excessive moisture can lead to warping, cupping, and even mold growth. To protect your floors, aim to keep your home’s indoor humidity levels between 30% and 50%. You can achieve this by running your air conditioner, using dehumidifiers in naturally damp areas like basements or bathrooms, and ensuring your home has good ventilation. Using exhaust fans in the kitchen and bathrooms when cooking or showering also helps vent excess moisture outside.
Consider Early Warning Systems
Your senses are your first line of defense. If you notice a persistent musty odor or see any dark spots that could be mold, it’s a clear sign that you have an underlying moisture problem that needs immediate attention. Addressing it quickly can prevent the issue from spreading and causing more significant damage. For added protection, you might consider installing smart water leak detectors near major appliances and pipes. These devices can send an alert directly to your phone the moment they detect moisture, allowing you to act before a small drip becomes a major flood. If you do find mold, it’s crucial to call for professional mold remediation to ensure it’s removed safely and completely.
Plan Your Repair Project from Start to Finish
Once the initial shock has passed and the water is under control, it’s time to create a clear plan of action. Tackling a water damage repair project without a strategy can lead to missed steps, unexpected costs, and a lot of frustration. A thoughtful plan will help you manage the process from start to finish, ensuring your beautiful hardwood floors are restored correctly and protected for the future. This involves understanding the full scope of the damage, navigating your insurance policy, deciding between DIY and professional help, and putting measures in place to prevent it from happening again.
Thinking through these steps will not only streamline the restoration but also give you peace of mind. You’ll be able to make informed decisions, allocate your budget effectively, and get your home back to normal much faster. Let’s walk through how to build a solid repair plan.
Evaluate the Total Impact
Water damage can be deceptive. What looks like a small puddle on the surface could be hiding a much bigger problem underneath. Because water can cause significant issues in less than 24 hours, a quick and thorough evaluation is your first priority. You need to assess the full extent of the damage, which includes the visible hardwood planks, the subfloor beneath, and even nearby baseboards and drywall.
Check for discoloration, warping, and any signs of mold or mildew, which can appear as black or green spots and often come with a musty odor. The faster you act, the better your chances are of saving the floor. A professional assessment can identify hidden moisture pockets and structural issues you might miss, giving you a complete picture of what needs to be repaired.
Work with Your Insurance Policy
Before you start any major repairs, take a moment to review your homeowner’s insurance policy. Many policies cover the cost of water damage restoration, especially when it’s from a sudden and accidental event like a burst pipe. Contact your insurance agent right away to report the damage and understand your coverage. They will guide you on how to file a claim and what documentation you’ll need.
Be prepared to provide the photos and videos you took of the initial damage, along with any receipts for emergency services. Working with a restoration company that has experience with insurance claims can be a huge help. They can often communicate directly with your provider, submitting the necessary paperwork and estimates to make the process smoother for you.
Conduct a Cost-Benefit Analysis
Now it’s time to decide whether this is a project you can handle yourself or if it’s time to call in the pros. You can often fix minor water damage on your own, like a small spill that was cleaned up quickly. However, if the damage is severe—think buckling boards, widespread discoloration, or signs of mold—it’s best to hire a professional.
Consider the long-term costs. A DIY repair might seem cheaper upfront, but if it’s not done correctly, you could face bigger problems like persistent mold growth or structural decay, which will be far more expensive to fix later. Professionals have the specialized equipment and expertise to dry, repair, and refinish your floors properly, ensuring the job is done right the first time.
Choose Long-Term Protection Solutions
After investing time and money into repairing your hardwood floors, the last thing you want is a repeat incident. The final step in your plan should be focused on prevention. Simple habits can make a big difference. Place high-quality mats at all entryways to catch water from wet shoes and use trays under pet bowls and indoor plants.
It’s also a good idea to regularly inspect your home for potential issues. Check for leaks under sinks, around toilets, and behind appliances like your dishwasher and washing machine. Reapplying a protective sealant to your hardwood floors every few years can also add a crucial layer of moisture resistance. These proactive steps are your best defense against future water damage.
Related Articles
- Emergency Water Extraction: A Complete Guide | SuperClean Restoration Services
- Roof Leak Water Damage: A Complete Guide | SuperClean Restoration Services
- Water Damage Repair Wellington: A Homeowner’s Guide | SuperClean Restoration Services
- Water Damage Restoration Palm Beach FL | SuperClean Experts
- Your Guide to Water Damage Restoration in Palm Beach | SuperClean Restoration Services
Frequently Asked Questions
My floorboards are slightly cupped but feel dry. Can I just sand them flat? It’s tempting to try and smooth things out right away, but you should wait before reaching for the sander. Cupping happens when the edges of the boards swell with moisture. If you sand them down while the wood is still retaining water, the boards will “crown” as they fully dry, leaving the center of each plank higher than the edges. The best approach is to give the wood plenty of time to dry out completely. Once the moisture content has returned to normal, the cupping may even correct itself.
How long does it really take for hardwood floors to dry after water damage? The drying time can vary quite a bit. It really depends on how much water was involved and the method you use. A professional restoration team with specialized dehumidifiers and air movers can often get the job done in just a few days. If you’re relying on air-drying with fans, the process can take much longer—anywhere from a few weeks to several months, especially in a humid climate. Patience is essential, as you need to be certain the wood is completely dry before attempting any repairs.
Can I save my hardwood floors, or will they always need to be replaced after water damage? You can definitely save hardwood floors in many cases. The final outcome depends on a few things: how quickly the water was removed, whether the water was clean or contaminated, and if the subfloor underneath was affected. If you act fast on a clean water leak, there’s a very good chance the boards can be dried, saved, and refinished. However, if the boards have severely buckled or the subfloor is soft and damaged, replacing the affected area is usually the most effective long-term solution.
What’s the biggest sign that I should stop my DIY repair and call a professional? The moment you suspect the problem goes deeper than the surface, it’s time to call for an expert opinion. A major red flag is any floorboard that feels soft, spongy, or bouncy when you press on it, as this indicates a wet and potentially weakened subfloor. Other clear signs are boards that are lifting completely off the subfloor (buckling) or any visible mold growth. These issues require professional equipment and knowledge to fix correctly and safely.
Is it always necessary to call my insurance company for a small leak? Even for what seems like a minor incident, it’s a smart move to document everything with photos and notify your insurance agent. Water damage can be tricky; a small spot on the surface could be hiding a much larger issue in the subfloor that doesn’t become apparent until later. Contacting your provider creates a formal record of the event. This can be incredibly valuable if you discover more extensive damage down the road and need to file a claim.