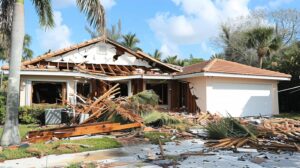
In the quiet moments after the storm passes, the sight of a damaged home can feel overwhelming. We know that feeling well. The wind has died down, the rain has stopped, but you’re left staring at broken windows, water stains spreading across your ceiling, or shingles scattered across your yard like fallen leaves. Your heart sinks. Your mind races with questions: Where do I even begin? How long will this take? Will things ever feel normal again?
Take a deep breath. You are not alone, and your home can be whole again.
This is a season of rebuilding, and we’re here to walk you through it, one step at a time. Having served the Wellington community through countless storms, we’ve guided families just like yours from that first moment of shock all the way through to the joy of walking back into a fully restored home. This guide will give you a clear, calm, and actionable timeline to navigate the repair process from start to finish. You’ll know exactly what to expect, what to do, and when to do it.
Your journey to restoration starts here, and we’ll be with you every step of the way.
Before You Call Anyone: Your Immediate Post-Hurricane Checklist
The First 24 Hours: Safety & Security Come First
Before you think about repairs, insurance, or contractors, your family’s safety is paramount. Here’s what you need to do in those critical first hours:
- Prioritize Safety Above All Else
- Stay away from downed power lines and report them immediately to your utility company
- If you smell gas or suspect a leak, leave your home immediately and call 911
- Watch for structural damage like sagging ceilings, cracked walls, or foundation issues—if your home looks unstable, do not enter
- Wear sturdy shoes and gloves if you need to navigate debris
- If you have any doubt about safety, wait for professional clearance before entering your home
- Connect With Your Community
- Contact family members to let them know you’re safe
- Check on elderly neighbors or those who might need assistance
- In Wellington, we look out for each other—this is when community matters most
- Document Everything Before You Touch Anything This step is absolutely critical for your insurance claim:
- Take photos and videos of every damaged area, both inside and outside
- Capture wide shots of each room and close-ups of specific damage
- Document damaged belongings, including furniture, appliances, and personal items
- Make a written inventory of damaged items with estimated values if possible
- Save these files in multiple places (cloud storage, email them to yourself, external drive)
- Prevent Further Damage (If Safe to Do So) Your insurance policy typically requires you to take reasonable steps to prevent additional damage:
- Cover broken windows with plywood or heavy plastic sheeting
- Place tarps over holes in your roof (only if it’s completely safe—never climb on a damaged roof)
- Remove standing water if possible using a wet/dry vacuum
- Move undamaged belongings to a dry area
- Keep all receipts for materials purchased for temporary repairs—these are often reimbursable
Now that you’ve taken these immediate steps, you’re ready to begin the formal restoration process.
Step 1: Contacting Your Insurance Company
When to Call: Within 24-48 Hours After the Storm
Time is of the essence. Most insurance policies require prompt notification of damage, and delays can complicate your claim. Here’s how to make that first call count:
What to Have Ready:
- Your insurance policy number
- Your contact information and the property address
- A general description of the damage
- The date and time the damage occurred
- Your photo and video documentation (have it accessible to reference)
What to Say: Be factual and thorough, but don’t embellish or speculate:
- Describe what happened: “Hurricane [name] caused wind and water damage to my roof, windows, and interior”
- List the affected areas: “I have damage to the roof, master bedroom ceiling, living room windows, and water damage throughout the second floor”
- Mention immediate safety concerns if any exist
What NOT to Say:
- Don’t admit fault or make statements like “I should have prepared better”
- Don’t agree to a settlement amount on the first call
- Don’t say the damage “isn’t that bad” or downplay it—let the adjuster assess
- Don’t say you’re not sure if you want to file a claim—file it and decide later
What Happens Next:
- You’ll receive a claim number—write it down and keep it somewhere safe
- An insurance adjuster will be assigned to your case
- You’ll be given a timeline for the adjuster’s inspection (typically 3-10 days after major storms, though this can be longer after widespread disasters)
- You’ll receive confirmation of your claim via email or mail
While you wait for the adjuster, it’s time to bring in professional help.
Step 2: Professional Damage Assessment & Mitigation
Timeline: Immediately After Filing Your Claim
This is one of the most important decisions you’ll make in the recovery process: calling a professional restoration company. Don’t wait for insurance approval—the mitigation and documentation phase must begin right away to prevent further damage.
Why Professional Help Matters Now:
A reputable restoration company will:
- Conduct a thorough assessment of all damage, including hidden issues you might miss
- Extract standing water and begin the drying process immediately to prevent mold growth
- Secure your property against weather, theft, and animals
- Document the damage professionally for your insurance claim
- Provide detailed estimates that insurance adjusters understand and respect
The Mitigation Phase: What Happens First
Within hours of your call, a professional team should arrive to:
- Extract water using industrial pumps and vacuums
- Set up commercial dehumidifiers and air movers to dry the structure
- Remove wet carpeting, padding, and damaged drywall if necessary
- Apply antimicrobial treatments to prevent mold
- Board up windows and tarp damaged roof areas securely
- Install temporary fencing if needed
A Note of Encouragement:
Watching strangers carry equipment into your damaged home can feel surreal, even frightening. But recognize this moment for what it truly is: the first powerful step toward recovery. You’ve moved from shock to action. The professionals are here, the machines are humming, and the work of restoration has officially begun. This is progress, and it’s happening because you made it happen.
Step 3: Navigating the Insurance Adjuster’s Visit
Timeline: 3-10 Days After Filing (Sometimes Longer After Major Storms)
The insurance adjuster’s visit is a crucial moment in your recovery. Their assessment will largely determine what your insurance company pays for repairs. Here’s how to make sure this visit goes smoothly:
How to Prepare:
- Organize all your documentation: photos, videos, receipts for emergency repairs, and your original claim information
- Create a written list of all damaged areas and items
- Don’t clean up too much—the adjuster needs to see the full extent of the damage
- Make the property accessible and safe for the inspection
Why Having Your Contractor Present Matters:
This is strongly recommended. Your restoration contractor brings:
- Technical expertise to identify hidden damage the adjuster might miss
- Professional credibility and experience working with insurance companies
- The ability to discuss repair methods and costs in industry terms
- Documentation that supports your claim
- An advocate who knows your rights and the insurance process
Understanding the Adjuster’s Role:
It’s important to remember that the adjuster works for the insurance company, not for you. They will:
- Inspect all damaged areas
- Take their own photos and measurements
- Determine what damage is covered under your policy
- Prepare an estimate of repair costs based on their findings
- Submit a report to your insurance company
After the Visit:
Within 7-14 days, you should receive:
- The adjuster’s report
- An initial settlement offer or estimate
- An explanation of coverage and any exclusions
Review everything carefully. If the estimate seems low or damage was missed, you have the right to dispute it—this is where having a professional contractor’s estimate is invaluable.
Step 4: Reviewing Estimates and Choosing Your Contractor
Timeline: After Receiving Your Insurance Adjuster’s Report
Now comes a critical decision: selecting the contractor who will restore your home. In the chaos after a hurricane, predatory contractors flood into affected areas. Here’s how to protect yourself and choose wisely:
How to Read a Restoration Estimate:
A professional estimate should include:
- A detailed scope of work (exactly what will be done, room by room)
- Itemized materials with specifications (not just “drywall” but “1/2-inch moisture-resistant drywall”)
- Labor costs broken down by task
- Timeline for completion
- Payment schedule tied to completion milestones
- Licensing, insurance, and warranty information
- Clear terms and conditions
Vetting Your Wellington Contractor:
Don’t rush this decision. Ask these critical questions:
- Are you licensed and insured? (Verify with the Florida Department of Business and Professional Regulation)
- How long have you been in business in Wellington? (Post-storm “storm chasers” appear overnight and disappear just as quickly)
- Can you provide local references and photos of completed projects? (Call those references)
- Will you handle the insurance paperwork and supplemental claims? (This is valuable service)
- Do you offer a warranty on your work? (Get it in writing)
- Who will be the project manager, and how will we communicate? (You should have a dedicated point of contact)
Red Flags to Watch For:
Avoid any contractor who:
- Asks for large upfront payments (30% or less is standard)
- Pressures you to sign immediately or uses high-pressure sales tactics
- Offers to waive your insurance deductible (this is insurance fraud)
- Doesn’t provide a written contract or estimate
- Can’t provide proof of licensing or insurance
- Has no physical business address or only a P.O. box
- Offers prices that seem too good to be true (they probably are)
Making Your Choice:
Select a contractor you trust, who communicates clearly, and who has deep roots in the Wellington community. This is a relationship that will last weeks or months—choose someone you’re comfortable working with closely.
Step 5: The Restoration & Rebuilding Phase
Timeline: 4-12 Weeks (Depending on Extent of Damage)
This is where patience meets progress. The restoration phase is the longest part of your journey, but it’s also where you’ll see your home transform from damaged to renewed.
What Happens During Restoration:
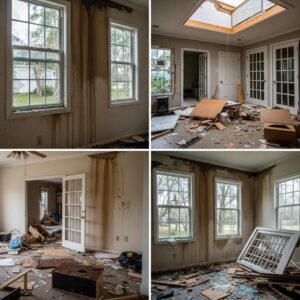
Phase 1: Demolition and Removal (Week 1-2)
- Removal of all damaged materials: drywall, insulation, flooring, cabinetry
- Disposal of unsalvageable belongings
- Cleaning and sanitizing all affected areas
- Treatment for mold prevention
- Your home will look worse before it looks better—this is normal and necessary
Phase 2: Structural Repairs (Week 2-6)
- Roof repairs or replacement
- Window and door replacement
- Structural framing repairs
- Electrical and plumbing repairs
- HVAC system repair or replacement
- This phase requires inspections and permits, which can affect the timeline
Phase 3: Reconstruction and Finishing (Week 6-12)
- New drywall installation and finishing
- Painting throughout
- New flooring installation
- Cabinet and trim installation
- Fixture and appliance installation
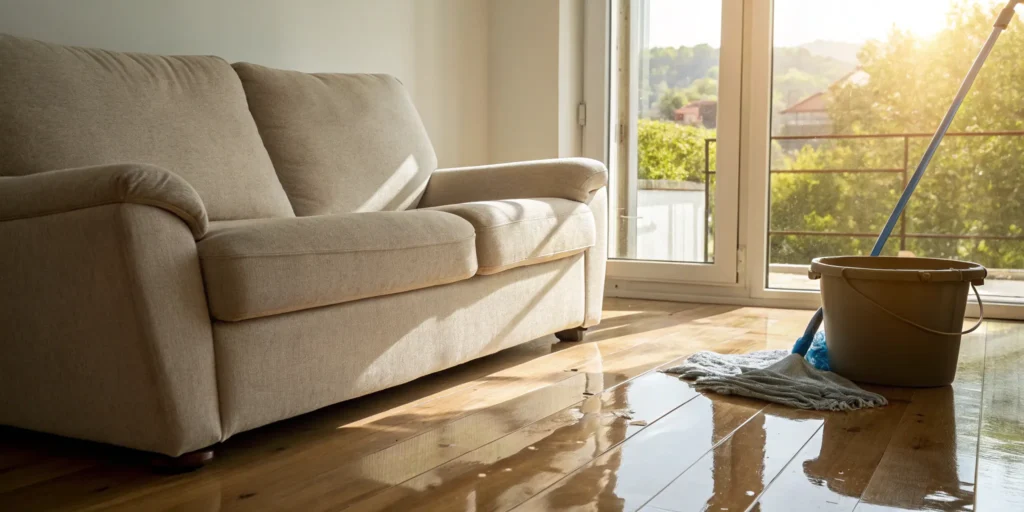
- Final touches that make your house feel like home again
A Word on Patience and Faith:
There will be hard days during this phase. You’ll walk through your home and see it torn apart. You might feel discouraged, exhausted, or frustrated by delays. These feelings are normal and valid.
But remember the story of Nehemiah, who faced the overwhelming task of rebuilding Jerusalem’s walls. The work seemed impossible, but he and his people rebuilt them in just 52 days because they “had a mind to work” and refused to lose heart. Your walls are being rebuilt too. Every piece of drywall, every coat of paint, every nail driven is an act of restoration—not just of your house, but of your sense of security, comfort, and home.
Trust the process. Stay in communication with your contractor. Visit the site regularly. And watch as, piece by piece, day by day, your home comes back to life, often even better and stronger than before.
Step 6: The Final Walkthrough and Completion
Timeline: Final Week of Project
The finish line is in sight. Your home is nearly restored, and it’s time for the final walkthrough—your opportunity to ensure everything has been completed to your satisfaction.
The “Punch List” Process:
During your final walkthrough with your project manager:
- Inspect every room thoroughly
- Check that all work matches the original scope
- Test all windows, doors, fixtures, and appliances
- Look for any imperfections: paint touch-ups needed, gaps in trim, unfinished details
- Create a written “punch list” of any items that need attention
Before Making Final Payment:
Do not make your final payment until:
- Every item on the punch list has been completed to your satisfaction
- You’ve received all warranty documentation
- You’ve received your certificate of completion
- You’ve received lien releases from the contractor and subcontractors (protecting you from future claims)
- All permits have been closed with the city
- You’ve taken final photos for your records
The Moment of Completion:
When you receive that certificate of completion and your contractor shakes your hand for the final time, take a moment to recognize what you’ve accomplished. You navigated insurance claims, made difficult decisions, endured weeks of chaos, and emerged on the other side. Your home stands restored. Your family has a safe place again.
This wasn’t just construction—it was an act of resilience.
Your Wellington Hurricane Repair Questions Answered
How long does the hurricane repair process usually take?
The complete process from initial damage to final completion typically takes 2-6 months, depending on the severity of damage. Mitigation happens within 24-48 hours, insurance processing takes 2-4 weeks, and the actual restoration work takes 4-12 weeks. After widespread hurricanes affecting many homes, timelines can extend due to high demand for contractors and building materials.
What’s the difference between a public adjuster and my insurance company’s adjuster?
Your insurance company’s adjuster works for and is paid by your insurance company. A public adjuster works for you and is paid a percentage of your settlement (typically 10-20%). Public adjusters can be helpful if your claim is denied, significantly underpaid, or extremely complex. However, for most homeowners working with a reputable restoration contractor who advocates for you, hiring a public adjuster isn’t necessary.
Will my homeowner’s insurance cover all the damage?
Not necessarily. Coverage depends on your specific policy, your deductibles, and the cause of damage. Wind damage is typically covered, but flood damage requires separate flood insurance. Your policy may have special hurricane deductibles (often 2-5% of your home’s insured value). Some policies have depreciation clauses that pay actual cash value first, then replacement cost after repairs are completed. Review your policy carefully or ask your contractor to help you understand your coverage.
What can I do if my claim is denied or underpaid?
First, request a detailed written explanation for the denial or low payment. Review your policy to understand the reasoning. Then, have your restoration contractor prepare a detailed estimate and documentation showing what was missed or undervalued. Submit a supplemental claim with this new information. If the insurance company still refuses to pay fairly, consider hiring a public adjuster or an attorney who specializes in insurance claims. Don’t give up—many initial denials are overturned with proper documentation and persistence.
Should I stay in my home during repairs?
This depends on the extent of damage. If major structural work is happening, if mold is present, or if utilities are disconnected, you should stay elsewhere. Your insurance policy may include “loss of use” or “additional living expenses” coverage that pays for temporary housing. If repairs are limited to certain areas and the home is safe and livable, you can often stay, though expect noise, dust, and disruption.
From Restoration to Renewal: Trust SuperClean Restoration Services
You Don’t Have to Navigate Hurricane Recovery Alone.
You’ve been through the storm; now let us guide you through the restoration. As your local Wellington partners, we manage the entire process with expertise and genuine care so you can focus on your family.
Call for a Free Damage Assessment: 844-888-0837
Email Us: Info@supercleanrestorationpb.com
Your Neighbors in Wellington—Licensed, Insured & Trusted.