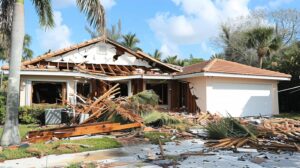
No landlord wants the call, but it’s one many receive: a tenant has found mold in the home. That sinking feeling in your stomach is justified. Mold remediation isn’t just about scrubbing away an unsightly patch on the wall—it’s a serious matter that can threaten your property value, your tenant’s health, and your reputation as a responsible landlord. Left unchecked, the damage mold can bring in a rental property can lead to costly repairs, legal disputes, and vacant units that drain your income.
This comprehensive guide will walk you through everything you need to know about mold remediation, from your legal responsibilities to a step-by-step remediation process, helping you handle the situation efficiently and professionally. Whether you’re dealing with your first mold complaint or looking to prevent future issues, understanding the complete mold remediation process is essential for protecting both your investment and your tenants.
What is Mold Damage and Why Is It in Rental Properties?
Mold is a type of fungus that reproduces through microscopic spores floating through the air. While mold plays an important role in nature by breaking down dead organic matter, it becomes a serious problem when it grows indoors. Mold thrives in environments where three conditions converge: moisture, organic material (like drywall, wood, or carpet), and warmth. Unfortunately, rental properties often provide the perfect breeding ground for mold growth.
Understanding the common causes of mold in rental properties helps you identify vulnerabilities before they become emergencies:
Leaky pipes or roofs create hidden moisture problems that can go undetected for weeks or months, allowing mold colonies to establish themselves behind walls or in attics.
Window condensation occurs when warm, humid indoor air meets cold window surfaces, creating persistent dampness on sills and frames that encourages mold growth.
Poor ventilation, especially in bathrooms and kitchens, traps moisture-laden air indoors. Without proper exhaust fans or air circulation, humidity levels remain elevated, creating ideal conditions for mold.
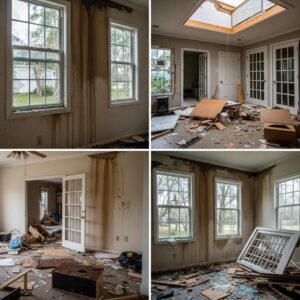
Past flooding or water damage that wasn’t properly dried and remediated often leads to recurring mold problems, even if the initial cleanup seemed thorough.
High humidity in general, particularly in naturally humid climates or during certain seasons, can cause mold to develop even without an obvious water source.
Recognizing these common culprits allows you to take preventive action and respond quickly when problems arise.
Your Legal Responsibilities as a Landlord
As a property owner, you’re legally obligated to provide tenants with habitable living conditions. This fundamental principle, known as the “warranty of habitability,” requires landlords to maintain safe, sanitary housing that meets basic standards. Significant mold growth can directly violate this warranty, exposing you to serious legal consequences.
The warranty of habitability isn’t just a moral obligation—it’s the law in virtually every state. When mold poses health risks or makes a unit unlivable, you cannot simply ignore it or delay action. Your landlord responsibility for mold extends to taking prompt, effective measures to identify, remediate, and prevent mold growth.
However, regulations vary significantly by location. Some states have specific statutes addressing mold disclosure, remediation timelines, and landlord responsibilities. Others rely on general habitability standards. Cities and counties may impose additional requirements beyond state law.
Legal Disclaimer: This article provides general information only and does not constitute legal advice. Landlord-tenant laws, mold regulations, and liability standards vary by jurisdiction. Always consult with a qualified legal professional in your area to understand your specific obligations and protect yourself from liability.
The consequences of negligence can be severe. Tenants may be legally entitled to withhold rent until the issue is resolved, break their lease without penalty, or sue for damages related to health problems or property damage. Health departments can issue violations, impose fines, or even condemn properties with serious mold problems. Beyond legal ramifications, neglecting mold issues damages your reputation and makes it harder to attract quality tenants in the future.
The Mold Remediation Action Plan: A Step-by-Step Guide
Effective mold remediation requires a systematic approach. Following these steps ensures you address not just the visible mold, but the underlying conditions that allowed it to grow.
Step 1: Respond & Investigate Immediately
Time is critical when dealing with mold in rental property. Every day you delay allows the problem to worsen, spores to spread, and potential health risks to increase. Take every tenant report seriously, even if it seems minor.
Begin by documenting the complaint thoroughly. Record the date, the tenant’s description of the problem, the location, and any symptoms they may be experiencing. This documentation protects you legally and helps track the remediation process.
Schedule an inspection as quickly as possible—ideally within 24-48 hours. During your visit, examine not just the visible mold but potential moisture sources. Look for water stains, feel for dampness, and check areas prone to humidity like bathroom ceilings, window sills, and basement walls.
Communication is key during this phase. Let your tenant know you take the issue seriously and outline your action plan, including mold inspection dates, expected timelines, and next steps. This transparency builds trust and demonstrates your commitment to maintaining a safe living environment.
Step 2: Identify the Moisture Source
This is perhaps the most critical step in the entire mold remediation process. Cleaning mold without eliminating its water source is completely futile—the mold will simply return. You’re not just treating a symptom; you must cure the disease.
Conduct a thorough investigation to find the moisture source. Common culprits include slow leaks under sinks or behind toilets, damaged roof flashing allowing water intrusion, cracked or missing caulking around tubs and showers, condensation from poorly insulated pipes, malfunctioning HVAC systems creating excess humidity, or foundation cracks allowing groundwater seepage.
Sometimes the source is obvious—a dripping pipe or visible roof leak. Other times, you may need to use moisture meters or thermal imaging cameras to detect hidden water problems behind walls or under flooring. If you cannot definitively identify the source, consider hiring a water damage specialist or building inspector with the proper diagnostic equipment.
Only after the moisture source is identified and repaired should you proceed with mold removal. This may mean fixing plumbing, replacing roofing, improving ventilation systems, or addressing drainage issues around the foundation.
Step 3: Containment: Stop the Spread
Before beginning mold removal for landlords, you must prevent spores from spreading to unaffected areas. Mold reproduces through airborne spores that easily travel through air currents. Disturbing mold during cleanup releases enormous quantities of spores that can contaminate other rooms, creating new problems.
Professional remediation teams create containment zones using heavy plastic sheeting to seal off affected areas. They use negative air pressure machines with HEPA filters to ensure air flows into the contaminated zone but doesn’t escape, capturing spores before they spread.
For smaller DIY projects, seal doorways and vents with plastic sheeting and tape. Turn off HVAC systems that could distribute spores through ductwork. Open windows in the affected area to ventilate directly outdoors if weather permits. While these measures aren’t as sophisticated as professional containment, they significantly reduce the risk of cross-contamination.
Step 4: DIY vs. Hiring Professional Restoration Services: The Critical Decision
Determining whether to tackle mold remediation yourself or hire certified professional restoration services is crucial. The wrong choice can lead to inadequate remediation, health risks, or unnecessarily high costs.
When DIY might be acceptable: If the mold covers a small area (generally less than 10 square feet), appears on non-porous surfaces like tile or metal, and the moisture source is simple to fix, you might handle it yourself. This typically applies to minor bathroom mold on tile or small patches on painted drywall.
When you should ALWAYS call a professional:
- Mold covers an area larger than 10 square feet
- Mold has penetrated porous materials like drywall, insulation, or carpeting
- Mold is growing inside HVAC systems or ductwork
- You suspect toxic mold species like Stachybotrys (black mold)
- The affected area was contaminated by sewage or floodwater
- The tenant has respiratory issues, allergies, or compromised immunity
- The building has a history of water damage or previous mold problems
- Hiring certified mold remediation professionals provides significant advantages. They possess specialized equipment including industrial dehumidifiers, air scrubbers with HEPA filtration, and moisture detection tools. They follow established protocols that ensure complete remediation. They can conduct post-remediation testing to verify the mold is gone. Perhaps most importantly, they carry liability insurance and follow safety procedures that protect both workers and occupants.
Professional mold remediation costs vary based on the extent of contamination, but attempting inadequate DIY remediation often costs more in the long run when the problem returns or spreads.
Step 5: The Removal & Cleaning Process
The actual mold removal process varies depending on the affected materials and extent of growth. Understanding the basic approach helps you evaluate whether work is being done properly.
For non-porous surfaces like tile, glass, or metal, aggressive cleaning with detergent solutions or commercial mold killers often suffices. The surface must be thoroughly scrubbed, rinsed, and completely dried.
Porous materials like drywall, ceiling tiles, carpeting, or insulation that have been heavily contaminated usually cannot be adequately cleaned and must be removed and disposed of properly. These materials harbor mold deep within their structure where cleaning agents cannot reach. Attempting to save heavily contaminated porous materials is false economy—the mold will return.
Semi-porous materials like wood framing or concrete may be salvageable with proper treatment, depending on how deeply the mold has penetrated. These require specialized cleaning methods and should typically be handled by professionals.
Throughout the cleaning process, proper personal protective equipment is essential. This includes N95 respirators at minimum (professionals use full-face respirators), gloves, eye protection, and disposable coveralls. Disturbing mold releases spores and mycotoxins that can cause respiratory problems, allergic reactions, and other health issues.
After removing contaminated materials and cleaning affected surfaces, thoroughly dry the entire area. Use dehumidifiers and fans to reduce humidity below 50% and ensure complete drying. Residual moisture will simply restart the mold growth cycle.
Step 6: Post-Remediation Verification
Never assume the job is complete just because visible mold is gone. Professional mold remediation includes verification that the problem is truly solved and won’t immediately recur.
For significant mold problems, consider hiring an independent third-party to conduct post-remediation testing. This might include air quality testing to measure spore counts or surface sampling to check for remaining contamination. An independent inspector (not the company that did the remediation) provides unbiased verification that the work was completed properly.
At minimum, conduct a thorough visual inspection once everything has dried. Look for any remaining discoloration, feel for dampness, and check that the moisture source has been permanently resolved. Monitor the area over the following weeks and months for any signs of returning mold, which would indicate either incomplete remediation or an unresolved moisture issue.
Document this final inspection with photographs and written notes. This documentation proves you completed proper remediation if questions arise later.
Proactive Prevention: How to Keep Mold Out for Good
The best mold remediation strategy is preventing mold from growing in the first place. Implementing proactive prevention measures protects your property, keeps tenants healthy and happy, and saves you from expensive emergency remediation.
Regular property inspections are your first line of defense. During routine inspections or seasonal walkthroughs, check for early warning signs like water stains, peeling paint, musty odors, or visible moisture. Inspect vulnerable areas including bathrooms, kitchens, basements, attics, and around windows and doors. Catching small leaks or moisture problems early prevents them from becoming major mold issues.
Ensure proper ventilation throughout the property. Install and maintain exhaust fans in bathrooms and kitchens, making sure they vent to the exterior, not into attics. Encourage airflow by ensuring windows can be opened and that rooms don’t feel stuffy or humid. In humid climates, consider providing dehumidifiers for basement apartments or units with chronic moisture issues.
Educate your tenants about their role in mold prevention. Provide a simple guide explaining how to prevent mold: use bathroom fans during and after showers, report leaks or water damage immediately, avoid blocking air vents, maintain reasonable indoor temperatures, and allow airflow behind furniture along exterior walls. Many tenants simply don’t realize how their daily habits affect moisture levels and mold growth. A little education prevents problems before they start.
Maintain gutters and downspouts to direct water away from the foundation. Clogged gutters cause water to overflow against siding or seep into basements. Ensure downspouts extend at least several feet from the foundation and that grading slopes away from the building to prevent water accumulation.
Address maintenance issues promptly. When tenants report dripping faucets, running toilets, or other minor plumbing issues, fix them quickly. These small problems are easy and inexpensive to resolve but can lead to costly mold damage if neglected.
Choose mold-resistant materials during renovations or repairs. Mold-resistant drywall, paint with mold inhibitors, and waterproof materials in bathrooms and basements make your property less vulnerable to mold growth.
Communicating with Your Tenants Through the Process
How you communicate with tenants during mold remediation can be as important as the remediation itself. Good communication prevents legal disputes, maintains positive relationships, and demonstrates your professionalism.
Be transparent about every step of the process. Explain what you found during inspection, what needs to be done, the expected timeline, and any disruption they should anticipate. If remediation requires them to temporarily vacate the unit, discuss arrangements and compensation. Tenants appreciate honesty even when the news isn’t great.
Document everything. Keep written records of all communications, whether by email, text, or letter. Save photographs of the mold before, during, and after remediation. Retain receipts, inspection reports, and contractor invoices. This documentation protects you if disputes arise and proves you took appropriate action.
Be empathetic. Acknowledge that living with a mold problem is stressful, uncomfortable, and potentially concerning for their health. Express genuine concern for their wellbeing and apologize for the inconvenience. A little empathy goes a long way toward maintaining positive tenant relationships and preventing small issues from escalating into legal battles.
Provide updates regularly. If remediation takes several days or you’re waiting for contractors, keep tenants informed. Brief text or email updates showing progress demonstrate your continued attention to the problem.
Follow up after completion. Once remediation is finished, walk through the unit with the tenant to show them the completed work and answer any questions. Ask them to monitor the area and report any concerns immediately. This follow-up closes the loop and reassures them the problem is resolved.
Frequently Asked Questions
Q: Who pays for mold remediation in a rental property?
Typically, the landlord is responsible for mold remediation costs, as mold usually results from property maintenance issues like leaks, poor ventilation, or water damage. However, if the mold resulted from tenant negligence—such as failing to report a known leak, deliberately blocking ventilation, or creating excessive moisture through unreasonable behavior—the tenant might be liable. Document the cause carefully to determine responsibility.
Q: Can my tenant break their lease because of mold?
Yes, depending on the severity and your response. If mold makes the unit uninhabitable and you fail to address it promptly, tenants may have legal grounds to break the lease without penalty under the warranty of habitability. Some states have specific laws allowing lease termination for serious mold problems. However, minor mold that’s quickly addressed typically doesn’t justify lease termination. Local laws vary significantly, so consult an attorney if faced with this situation.
Q: Does my landlord insurance cover mold damage?
Mold coverage varies widely among insurance policies. Many policies cover mold remediation if it results from a “covered peril” like a burst pipe, sudden water heater failure, or storm damage. However, mold from gradual issues like slow leaks, poor maintenance, or high humidity is typically excluded. Neglect-related mold is almost never covered. Review your policy carefully and consider purchasing additional mold coverage if it’s not included. Preventing mold through proper maintenance is far less expensive than paying for remediation out-of-pocket.
Q: How long does professional mold remediation take?
Professional mold remediation typically takes between 1-5 days, depending on the extent of contamination and the affected area size. Small, isolated mold problems might be resolved in a single day. Larger projects involving multiple rooms, removal of extensive materials, or severely contaminated properties can take a week or more. Drying time after remediation adds additional days. Your remediation contractor should provide a timeline estimate after assessing the damage.
Q: What are tenant rights regarding mold?
Tenants have the right to safe, habitable housing free from health hazards, including significant mold growth. They can typically report mold to health departments if landlords don’t respond appropriately. Depending on local laws, tenants may withhold rent, break their lease, or sue for damages if mold issues aren’t addressed. However, tenants also have responsibilities to report problems promptly, use the property reasonably, and not cause moisture problems through negligence. Tenant rights mold protections vary by jurisdiction.
Q: How can I tell if mold in my rental property is dangerous?
All mold growth indoors should be taken seriously, but certain situations raise greater concerns. Large areas of mold (over 10 square feet), mold in HVAC systems where spores can spread throughout the building, and suspected toxic species like Stachybotrys (black mold) require immediate professional attention. If tenants experience symptoms like respiratory problems, persistent coughing, headaches, or allergic reactions that improve when away from the property, treat the situation as urgent. When in doubt, hire a professional mold inspector to assess the type and extent of contamination.
A Healthy Home is a Healthy Investment
Mold remediation might seem daunting, but a systematic approach protects your property and tenants. The key principles: respond immediately, fix moisture problems, choose appropriate remediation methods, document everything, and implement prevention measures.
Effective mold management prioritizes prevention through regular inspections, proper maintenance, and tenant education. This investment saves exponentially more in avoided remediation costs, legal fees, and tenant turnover.
Your reputation depends on how you handle challenges like mold. Tenants remember landlords who respond professionally and prioritize their safety. With this guide’s knowledge, you can handle mold efficiently and legally, turning potential disasters into manageable maintenance issues.
Conduct a moisture assessment, check for warning signs, ensure exhaust fans work, and educate tenants on prevention. Need professional help? Contact SuperClean Restoration Services at 844-888-0837 or email Info@supercleanrestorationpb.com for expert mold inspection and remediation services.