You’ve spotted an ugly, dark patch of mold on your bathroom ceiling or in the corner of your basement. Your first instinct might be to grab a can of paint and make the problem disappear. It seems like a quick, easy fix—roll on a fresh coat, and within an hour, that unsightly stain is gone. Problem solved, right?
We get it. Painting over mold is tempting because it’s fast, inexpensive, and makes the visual problem vanish instantly. But here’s the truth you need to hear: painting over mold is one of the worst decisions you can make for your home and your health.
In short, you absolutely should not just paint over mold. Doing so is like putting a small bandage on a serious wound—it hides the problem but allows the infection to get worse underneath. In this article, you’ll learn exactly why painting over mold is so dangerous, discover the correct step-by-step method to eliminate mold before painting, understand when you need to call in professionals, and find out how to prevent mold from returning in the future.
The Hidden Dangers: Why Painting Over Mold Damage is a Terrible Idea
Covering up mold doesn’t make it go away. In fact, it creates a more dangerous situation for both your home and your health. Here’s what’s really happening under that fresh coat of paint.
- It Feeds the Fungus Here’s an ironic twist: the very paint you use to cover mold can actually become food for it. Mold is a living organism that feeds on organic materials, and many paints—especially latex-based varieties—contain organic compounds that mold finds delicious. By painting over an active mold colony, you’re essentially giving it a buffet while tucking it in for the night. The mold will happily consume the paint’s organic binders, growing stronger and spreading further beneath the surface.
- It Traps Moisture, Fueling Growth Paint creates a seal over whatever surface you apply it to, and when that surface is moldy, you’re trapping the very thing mold loves most: moisture. This sealed environment becomes a perfect incubator for mold growth. With moisture trapped underneath and a fresh food source on top, the mold colony will continue to expand, eating away at the drywall or wood beneath. Eventually, that mold will become so robust that it pushes right through your new paint job, causing bubbling, peeling, and discoloration—often within weeks or months.
- It Doesn’t Stop Health Risks The cosmetic fix of painting over mold does absolutely nothing to address the serious health hazards it poses. Active mold colonies continuously release microscopic spores into the air, along with potentially harmful mycotoxins. These invisible threats can cause respiratory issues, trigger allergic reactions, aggravate asthma, cause headaches, and lead to other health problems—especially in children, elderly individuals, and those with compromised immune systems. A layer of paint doesn’t stop these dangerous particles from circulating through your home’s air.
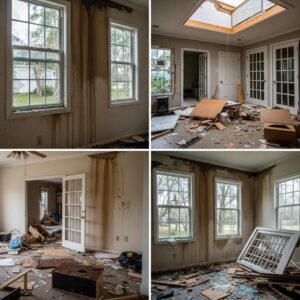
- It Causes Deeper Structural Damage While you’re admiring your freshly painted wall, hidden mold is quietly destroying your home’s structure. Mold feeds on organic building materials like wood and drywall, breaking them down over time. This leads to rotting wood studs, crumbling drywall, weakened floor joists, and compromised structural integrity. What might have been a simple cleaning job when you first noticed the mold can turn into thousands of dollars in structural repairs if left to grow unchecked behind a cosmetic paint layer.
The Right Way: A Step-by-Step Guide to Dealing with Mold Before You Paint
So, what should you do? Follow these crucial steps to eliminate the mold for good and properly prepare the surface for a fresh, lasting paint job.
Step 1: Safety First! (Gear Up) Before you start tackling mold, protect yourself with proper personal protective equipment:
- N95 or P100 respirator mask – Essential for filtering out mold spores that become airborne during cleaning.
- Safety goggles – Protect your eyes from spores and cleaning solutions.
- Long rubber gloves – Prevent skin contact with mold and harsh cleaning agents.
- Long sleeves and pants – Minimize skin exposure to mold spores.
Step 2: Identify and Fix the Moisture Source This is the most important step in the entire process—if you skip it, everything else is pointless. Mold doesn’t grow without moisture, so if you don’t eliminate the water source, the mold will always return, no matter how thoroughly you clean or how many coats of paint you apply.
Common moisture sources include:
- Leaking pipes – Check under sinks, behind toilets, and in walls.
- Roof leaks – Inspect your attic after heavy rains.
- High humidity – Particularly problematic in bathrooms, kitchens, and basements.
- Condensation – Often occurs on windows, pipes, and in poorly insulated spaces.
- Poor ventilation – Traps moisture indoors with nowhere to escape.
Don’t move forward until you’ve identified and completely fixed the moisture problem.
Step 3: Clean and Kill the Mold Once the moisture source is resolved, it’s time to eliminate the existing mold.
You have several effective options for cleaning solutions:
- Commercial mold remover – Follow manufacturer instructions carefully.
- White vinegar solution – Spray undiluted white vinegar directly on the mold.
- Hydrogen peroxide solution – Use 3% hydrogen peroxide in a spray bottle.
Pro-Tip: Many people reach for bleach first, but experts often advise against using it as your only solution. While bleach can kill surface mold and whiten stains, it doesn’t penetrate porous materials like drywall or wood where mold roots live. It can also leave behind moisture that encourages regrowth. For surface mold on non-porous materials like tile, bleach works fine, but for porous surfaces, vinegar or hydrogen peroxide are better choices.
Application instructions:
- Spray your chosen solution generously on the moldy area.
- Let it sit for 10-15 minutes to penetrate and kill the mold.
- Scrub the area thoroughly with a stiff brush.
- Wipe the area clean with a damp cloth.
- Repeat if necessary for stubborn stains.
Step 4: Dry the Area Completely This step cannot be rushed. The surface must be absolutely, completely, bone-dry before you move to priming and painting. Any residual moisture will invite mold to return. Use fans, open windows, or run a dehumidifier to speed up the drying process. Depending on the size of the area and humidity levels, this could take anywhere from several hours to a full day or more.
Step 5: Prime with a Stain-Blocking and Mold-Inhibiting Primer A specialized primer is non-negotiable if you want lasting results. Look for a primer that does two things: blocks stains and inhibits mold growth. These primers prevent any residual discoloration from bleeding through your topcoat and add a layer of antimicrobial protection to discourage future mold growth. Popular options include oil-based stain-blocking primers and shellac-based primers specifically formulated for mold remediation projects.
Step 6: Paint with a High-Quality, Mold-Resistant Paint For the final step, choose a paint specifically formulated for high-moisture areas. These paints, often labeled for bathrooms and kitchens, contain mildewcides—additives that resist mold and mildew growth. While they’re not a substitute for proper mold removal and moisture control, they provide an extra layer of protection, especially in rooms prone to humidity. Apply at least two coats for optimal coverage and protection.
When to Call for Professional Mold Remediation and Restoration Services
While small patches of surface mold can often be a DIY job, some situations require a professional. Don’t risk your health or your home’s structural integrity—call a certified mold remediation specialist if you encounter any of these situations:
- The moldy area is larger than 10 square feet (roughly a 3×3 foot patch).
- You suspect hidden mold in walls, under flooring, in your HVAC system, or other inaccessible areas.
- The mold keeps coming back after you’ve cleaned it.
- There’s a persistent, musty odor that won’t go away.
- You or household members experience allergy-like symptoms, respiratory issues, or unexplained illnesses that improve when away from home.
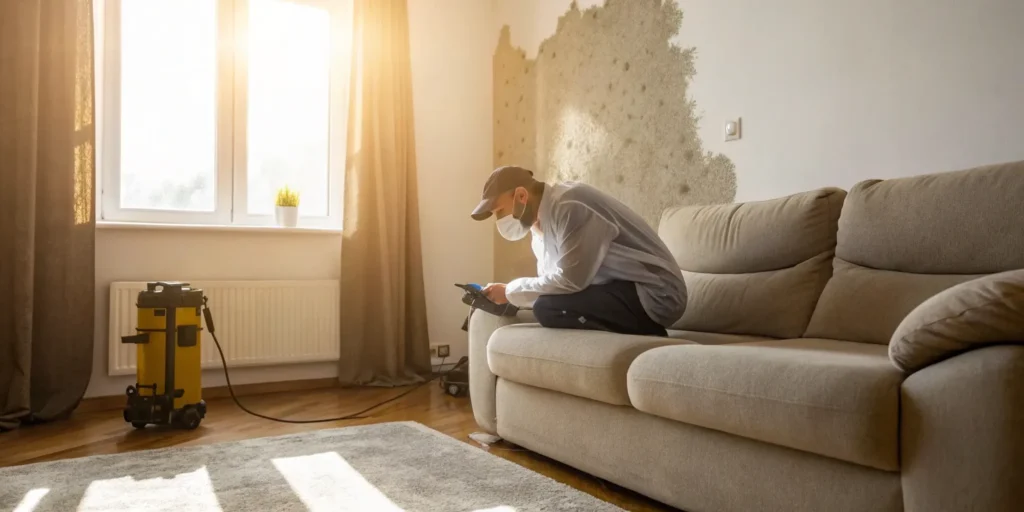
Professional remediators have specialized equipment, training, and techniques to safely remove extensive mold and identify hidden problems that homeowners might miss.
Prevention is the Best Cure: Keeping Your Home Mold-Free
Once you’ve done the hard work of eliminating mold and properly painting the affected area, here’s how to prevent mold from ever becoming a problem again.
Control Humidity Keep indoor humidity levels below 50% year-round. Use a hygrometer to monitor humidity levels, and employ dehumidifiers in naturally damp areas like basements and crawl spaces. Air conditioners also help reduce humidity during warmer months.
Improve Ventilation Proper air circulation is one of your best defenses against mold. Use exhaust fans in kitchens and bathrooms every time you cook or shower, and run them for at least 15-20 minutes afterward. Ensure your attic and crawl spaces are well-ventilated. Open windows when weather permits to allow fresh air circulation.
Fix Leaks Immediately Make it a habit to regularly inspect your home for signs of water intrusion. Check your roof after storms, examine plumbing fixtures periodically, and inspect your foundation for cracks. When you discover a leak, no matter how small, fix it immediately.
Frequently Asked Questions (FAQ)
Q: What’s the difference between mold and mildew? A: Mildew is a type of mold, but it’s typically powdery, white or gray, and grows on surfaces. Mold tends to be fuzzy or slimy, comes in various colors (black, green, etc.), and penetrates materials. Both should be cleaned promptly, but mold is more concerning because it can cause more extensive damage and health issues.
Q: Can I use “mold-killing paint” directly on mold? A: No. These paints are designed for prevention on clean surfaces, not for killing existing mold. You must clean and remove existing mold first, then use these specialty paints as a protective measure.
Q: How can I tell if mold is behind my walls? A: Look for signs like bubbling or peeling paint, warped wallboard, a persistent musty smell, or visible water stains. If you’ve had water damage in the past, there’s a higher likelihood of hidden mold. Professional mold inspectors can use moisture meters and infrared cameras to detect hidden problems.
Q: What does the professional mold remediation process involve? A: The process typically includes inspection, containment of the affected area, air filtration, complete mold removal, treatment with antimicrobial agents, drying and dehumidification, and final restoration of damaged materials.
Q: How is basement mold different from mold in other areas of the home? A: Basement mold is common due to higher humidity, poor ventilation, and proximity to ground moisture. Remediation often requires addressing underlying moisture issues, which may include installing proper drainage, waterproofing, and dehumidification systems.
Q: When do I need water damage restoration services versus just mold removal? A: Water damage restoration is necessary after significant water intrusion (flooding, burst pipes). These services address structural drying and reconstruction in addition to mold removal. If you only have isolated mold, targeted removal may be sufficient.
Q: Do commercial properties require different mold remediation than residential homes? A: Yes, commercial mold remediation often involves larger areas, stricter regulations, and consideration for business operations. Projects may require after-hours work and extensive documentation for insurance and compliance.
Q: How does mold inspection affect air quality in my property? A: A professional inspection can improve air quality by identifying hidden contamination. Specialists may conduct air quality testing to measure spore levels. Post-remediation testing confirms that cleanup was successful and your property is safe.
Q: What restoration resources are available for property owners dealing with mold damage? A: Resources include certified remediation companies, damage restoration specialists, insurance claim assistance, and air quality testing services. Many companies offer comprehensive services to coordinate the entire recovery process.
Q: How long does the complete mold removal and cleanup process take? A: The timeline varies. A small DIY job may take a day. Professional remediation for moderate contamination typically takes 2-5 days, while extensive projects involving structural repairs can take 1-2 weeks or longer.
Q: Can storm damage lead to mold problems in my home? A: Absolutely. Storm damage is a common cause of mold. Heavy rains can cause leaks and flooding that create ideal conditions for mold. It’s critical to begin water removal and drying within 24-48 hours after a storm.
Conclusion
Never just paint over mold. It’s a dangerous shortcut that traps moisture, allowing hidden mold to damage your home’s structure and affect your family’s health. The only true solution is to completely eliminate the mold, fix the underlying moisture problem, and then use specialized mold-inhibiting primers and paints. Doing it right is the only way to protect your home’s value and your family’s wellbeing.
CTA Blurbs
Don’t just cover up mold. Eliminate it. We never take shortcuts. Our process ensures mold is completely removed and the moisture source is fixed before any finishing work begins, guaranteeing a safe and lasting result for your home. Call us today.
Call for a Real Solution: 844-888-0837
Email for an Estimate: Info@supercleanrestorationpb.com