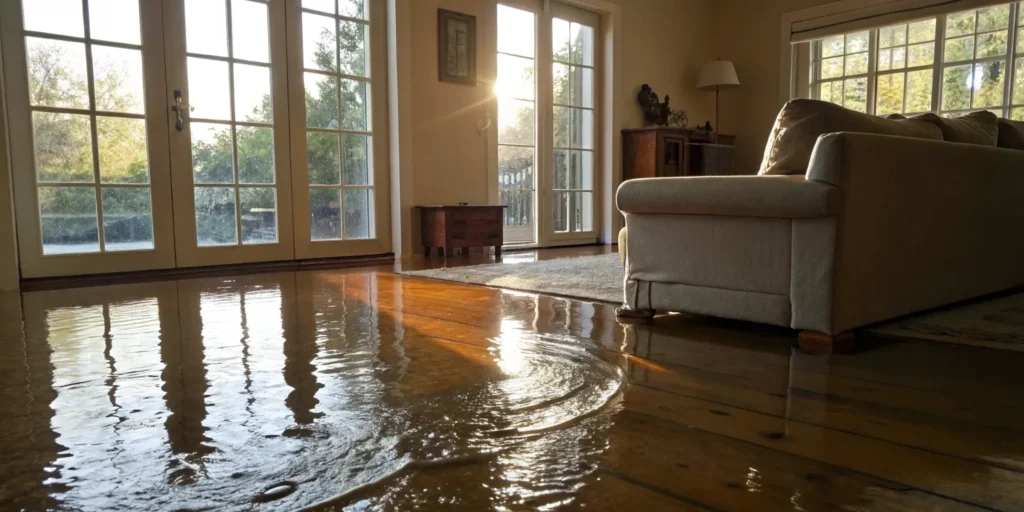
When you discover water on your floors, the visible puddle is only the beginning of the story. Water is sneaky, seeping between planks and soaking deep into the subfloor where you can’t see it. This hidden moisture is where the real danger lies, creating a perfect environment for mold growth and causing long-term structural rot. Simply drying the surface isn’t enough; you have to address the moisture trapped beneath. This article will explain the full extent of hardwood floor water damage, helping you understand the risks of what’s happening below the surface and why a professional assessment is so crucial for protecting your home and your health.
Key Takeaways
- Speed Is Your Most Important Tool: The moment you find water, your first job is to stop the source and remove all visible liquid. Acting quickly with towels, a wet/dry vac, and fans is the single best thing you can do to minimize damage to your floors.
- Don’t Underestimate Hidden Moisture: A floor that looks dry on the surface can still be dangerously wet underneath. If you notice any warping, buckling, or discoloration, it’s time to call a professional who can find and remove trapped moisture before it leads to mold and rot.
- A Simple Prevention Plan Is Your Best Defense: You can avoid future water issues with a quick monthly routine. Check appliance hoses and under-sink pipes for leaks, ensure your floor’s protective sealant is intact, and use a dehumidifier to manage indoor humidity.
How to Identify Water Damage on Hardwood Floors
Finding water on your hardwood floors is stressful. Whether from a burst pipe or a slow leak, water is wood’s worst enemy. Catching it early is key, as the signs aren’t always obvious. Knowing what to look for can mean the difference between a simple repair and a full floor replacement. Let’s go over how to spot the trouble signs and understand how water affects your floors.
Common causes of water damage
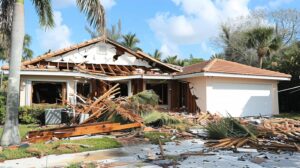
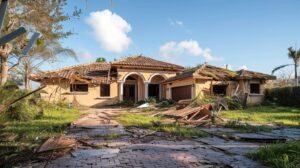
Water damage often comes from sources inside your home. A faulty appliance, like a leaking dishwasher or refrigerator, can cause significant issues over time. Burst pipes and overflowing sinks are other common culprits. In Florida, we also have to consider flooding from heavy rains. Understanding these potential sources of water damage helps you pinpoint the problem faster, so you can address the issue before it gets out of hand.
Signs and symptoms to watch for
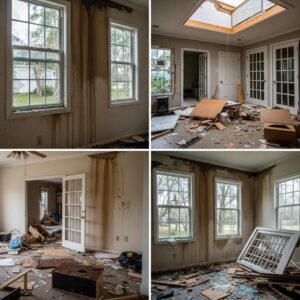
Your floors will tell you when something is wrong. Beyond visible water, look for changes in the wood’s appearance, like dark stains or discoloration. Are the boards bending or twisting? That’s called warping. Other signs include cupping (edges are higher than the center) or crowning (the opposite). Also, look for a peeling or bubbling finish. A musty smell is another red flag, often pointing to hidden mold growth that accompanies water damage.
The different types of water damage
Water can harm your floor on multiple levels. Surface damage affects the finish, appearing as white spots, and is the easiest to fix. More serious damage happens when wood boards absorb water and swell, leading to warping. The worst damage occurs underneath, affecting the subfloor. If the subfloor gets wet, it can rot and lose its structural integrity. This hidden damage is why a professional inspection is so crucial.
How moisture affects various wood species
All wood is porous and acts like a sponge. Softer woods absorb water more quickly than dense hardwoods, but all wood is vulnerable. The most important rule is that the longer wood stays wet, the more severe the damage will be. That’s why you should always assume there’s damage after any water event and act immediately. Time is your biggest enemy when it comes to saving your floors.
Your First Steps for Water-Damaged Floors
Discovering water on your hardwood floors can be alarming, but taking the right steps quickly can make all the difference. Your immediate response is the most critical factor in minimizing damage and setting the stage for a successful restoration. Here’s what you need to do right away.
Immediate actions you should take
First, stop the source of the water. Whether it’s a burst pipe or a faulty appliance, you need to shut off the water supply immediately. If you can’t find the specific shut-off valve, don’t hesitate to turn off the main water supply to your home. Once the flow has stopped, your next job is to remove as much standing water as possible. Grab towels, a mop, or a wet/dry vacuum to soak up all visible water from the floor’s surface. The goal is to get the area as dry as you can, as fast as you can, to prevent water from seeping deeper into the wood and subfloor.
Essential tools you’ll need
To effectively dry the area, you’ll need more than just towels. A wet/dry vacuum is excellent for pulling water from the surface and between floorboards. After removing the standing water, set up high-powered fans and blowers to circulate air across the floor, which helps speed up evaporation. A dehumidifier is also crucial; it works by pulling moisture out of the air, which in turn helps draw moisture out of the wood and surrounding materials like drywall and trim. You can often rent this equipment from a local hardware store if you don’t own it. These tools are your first line of defense in the drying process.
When to call in the professionals
While you can handle the initial water removal, some situations require immediate professional help. If the water damage is extensive, if the floorboards are already buckling or warping, or if the water has been sitting for more than a day, it’s time to call for backup. Professionals have specialized equipment that can detect hidden moisture and dry floors much faster and more thoroughly. At SuperClean Restoration, we offer a 24/7 emergency response because we know that severe water damage can’t wait. If you suspect the subfloor is wet or see any signs of mold, calling an expert is the safest and most effective choice.
How to document damage for insurance
Before you move anything or start major cleanup, take a moment to document the scene for your insurance claim. Use your phone to take plenty of photos and videos of the affected area. Capture the source of the leak, the standing water, and any visible damage to the floors, walls, and furniture. It’s also helpful to create a simple timeline of events. Note when you discovered the damage, what caused it, and the steps you took to mitigate it. This documentation will be invaluable when you file a claim and can help ensure the process goes smoothly.
How Professionals Dry and Restore Your Floors
When you call in a team like SuperClean Restoration, you’re getting more than just a few fans. Professional water damage restoration is a precise science aimed at saving your beautiful hardwood floors and preventing long-term problems like mold and structural decay. The goal is to remove the water you can see and, more importantly, the moisture you can’t. This involves a systematic process of assessing the damage, creating a strategic drying plan, and using powerful, specialized equipment to restore your home’s environment to its proper balance.
Unlike a DIY approach, which often only addresses surface-level wetness, a professional service tackles moisture trapped in the wood, the subfloor, and even the surrounding air. We use a combination of advanced techniques to measure moisture levels accurately, create optimal drying conditions, and monitor the entire process from start to finish. This ensures that every layer of your flooring is thoroughly dried, protecting your investment and giving you peace of mind. It’s a detailed approach that makes all the difference between a temporary fix and a lasting solution.
Techniques for testing moisture levels
Before any drying begins, the first step is a thorough assessment. Professionals don’t just look for visible water; they need to understand exactly how far the moisture has traveled. To do this, they use specialized tools like moisture meters. These devices can detect moisture content deep within the wood planks and the subfloor beneath. This data-driven approach helps create a complete picture of the damage. A professional will check if your floor has dried to the normal level for our area, which is typically between 5-10% moisture content. This initial testing is critical for developing an effective drying strategy and establishing a baseline for success.
Advanced drying equipment explained
The fans and dehumidifiers you can buy at a hardware store simply aren’t powerful enough for serious water damage. Professional restoration teams arrive with commercial-grade equipment designed for rapid and efficient drying. This includes high-velocity air movers, which are strategically placed to direct airflow across the surface of the floors, accelerating evaporation. At the same time, large, powerful dehumidifiers work to pull that moisture out of the air. The combination of these tools creates an ideal drying environment. To properly dry wet hardwood floors, this equipment often needs to run continuously for at least 24 hours, sometimes much longer, to be effective.
A typical timeline for drying
Patience is key when it comes to drying hardwood floors. While everyone wants a quick fix, rushing the process can lead to bigger problems down the road. Depending on the extent of the flooding and the type of wood, the drying process can take anywhere from a few days to several weeks. In some cases, the damage is so extensive that the top layer of flooring must be removed to properly dry the subfloor. This is especially important because trapping moisture underneath new or restored flooring is a recipe for mold growth and wood rot. A professional will provide a realistic water damaged floors guide and timeline based on their initial assessment.
Monitoring the restoration process
Setting up the drying equipment is just the beginning. A true professional will return to your property regularly to monitor progress and make adjustments as needed. Using moisture meters, they will track the moisture levels in your floors and the surrounding materials to ensure they are decreasing at a steady rate. This careful monitoring is what separates a professional job from a guess. The goal is to completely dry and dehumidify an area, removing every bit of hidden moisture. This continues until your floors have returned to their normal, safe moisture content, ensuring the restoration is complete and your home is safe.
DIY Repair vs. Calling a Professional
When you find water on your hardwood floors, your first instinct might be to handle it yourself. And sometimes, you can! But knowing when to grab a towel versus when to call for backup is key to protecting your floors and your home. This decision often comes down to the amount of water and how long it’s been sitting. Let’s walk through what you can do on your own and when it’s time to bring in a professional team.
Techniques for fixing minor damage
If you’ve caught a small spill right away, a DIY approach can work. The goal is to act fast before the water has a chance to soak deep into the wood. First, stop the source of the water immediately. Next, get rid of any standing water with towels or a wet/dry vacuum. Once the surface is clear, set up fans and a dehumidifier to pull moisture from the air and the floorboards. After the area is completely dry, you can clean and disinfect it to prevent any mildew from forming. These quick fixes are effective for minor incidents, but they won’t solve a larger problem.
When a DIY approach makes sense
A DIY fix is really only suitable for surface-level spills that are caught and cleaned up almost instantly. Think of a tipped-over glass of water or a small leak from a pet bowl. If you see more serious signs of damage, it’s time to put down the tools and pick up the phone. Red flags include buckling or warping floorboards, widespread discoloration, a musty smell that could indicate mold, or any sign that water has reached the subfloor. Trying to fix these issues yourself can often lead to bigger, more expensive problems down the road.
Professional methods for restoration
When you call in experts, we bring specialized equipment and knowledge that goes far beyond fans and towels. The first thing we do is use moisture meters to find out exactly how wet your wood and subfloor are. This step is crucial because it helps us find hidden water damage that isn’t visible to the naked eye. From there, we use powerful, industrial-grade air movers and dehumidifiers to dry the area efficiently. If the damage is severe, the process might involve carefully removing the damaged flooring, drying or replacing the subfloor, and then installing a new floor.
Understanding the costs involved
The cost of repairing water-damaged hardwood can vary widely. A small, contained issue might not be too expensive, but extensive damage is another story. If floorboards are lifting several inches, they almost always need to be replaced entirely. This means paying for the removal of the old floor, ensuring the subfloor is sound, and then the cost of new materials and installation. It’s also worth noting that even floors marketed as “waterproof” can be ruined if a large amount of water seeps underneath to the subfloor, often requiring a full replacement.
The basics of insurance coverage
Many homeowners assume their insurance policy will automatically cover any and all water damage, but that’s not always the case. Coverage often depends on the source of the water—a sudden pipe burst might be covered, while gradual damage from a slow leak might not be. It’s so important to read your policy carefully to understand what’s included. Documenting the damage with photos and notes as soon as you discover it is a critical step for any potential claim. Understanding your insurance coverage before you have a problem can save you a lot of stress and confusion.
Common Myths About Water-Damaged Floors
When you find water pooling on your hardwood floors, it’s easy to panic and make quick decisions. Unfortunately, a lot of common “knowledge” about water damage is actually incorrect and can lead to bigger, more expensive problems. Let’s walk through some of the most persistent myths about water-damaged floors. Getting the facts straight will help you handle the situation correctly and protect your beautiful home from long-term issues.
Misconceptions about drying methods
One of the most common mistakes homeowners make is thinking that if a floor looks and feels dry, the problem is solved. You might set up a few box fans, run a dehumidifier for a day or two, and assume you’re in the clear. However, this is a dangerous misconception. While the surface may appear dry, water is incredibly sneaky. It can seep between floorboards, soak into the subfloor, and get trapped in the wood grain itself. True drying requires more than just surface-level air circulation; it involves removing moisture from deep within the materials.
The risks of hidden moisture
That lingering, hidden moisture is where the real trouble begins. It creates the perfect breeding ground for mold and mildew, which can start growing within just 24 to 48 hours and pose a significant health risk. Beyond mold, trapped water will continue to damage your floors from the inside out, causing the wood to warp, cup, or buckle over time. Professional water damage restoration services use specialized tools like moisture meters and thermal imaging cameras to detect hidden dampness and industrial-strength air movers and dehumidifiers to ensure every layer of your flooring is completely dry.
Assumptions about insurance coverage
Many people believe that their homeowner’s insurance policy is a catch-all for any water-related incident. This is a myth that can have serious financial consequences. In reality, coverage depends heavily on the source of the water. Most standard policies cover damage from sudden and accidental events, like a burst pipe or a faulty appliance hose. However, they often exclude damage from gradual leaks, poor maintenance, or natural floods. It’s essential to review your policy and contact your insurance agent right away to understand your coverage and start the claims process correctly.
Professional vs. DIY results
In an effort to save money, you might be tempted to tackle water damage restoration yourself. While the DIY spirit is admirable, the myth that it’s a sufficient solution can be costly. Time is absolutely critical, and professionals have the high-powered equipment to extract water and dry your home far more quickly and effectively than any rental equipment can. They also have the expertise to assess the extent of the damage, salvage materials you might think are lost, and prevent secondary issues like mold. Hiring a professional isn’t just about fixing the immediate problem; it’s about protecting your property’s value for the long haul.
Protect Your Floors from Future Water Damage
After restoring your beautiful hardwood floors, the last thing you want is to go through the same ordeal again. Taking a few proactive steps can make all the difference, protecting your investment and giving you peace of mind. Think of it as creating a defense plan for your home. In a place like Palm Beach County, where humidity and sudden storms are a part of life, being prepared is key.
Preventing future water damage doesn’t have to be complicated or expensive. It’s about building smart habits and using the right tools to stay ahead of potential problems. From applying the right sealant to creating a simple maintenance checklist, these strategies will help keep your floors dry and safe for years to come. We’ll walk through some practical ways to safeguard your home, from simple checks you can do yourself to knowing when a professional eye can spot trouble you might miss.
Using protective coatings and sealants
One of the best first lines of defense for your hardwood is a quality protective finish. Think of it like a raincoat for your floors. A professionally applied coating, such as polyurethane, creates a durable barrier that repels water and resists moisture penetration. While it won’t make your floors completely waterproof, it buys you precious time to wipe up spills before they have a chance to seep into the wood and cause staining or warping. If you’re unsure about your floor’s current finish, or if it’s showing signs of wear, consider having a professional assess and reapply a sealant to restore its protective qualities.
Methods for controlling humidity
In Florida, the battle against moisture isn’t just about leaks and floods; it’s also about the air inside your home. High humidity can cause wood floors to swell, cup, and warp over time. Keeping your home’s indoor humidity levels in check is crucial for the long-term health of your hardwood. You can maintain a balanced environment by running your air conditioner, using dehumidifiers in damp areas like basements or laundry rooms, and ensuring good airflow with ceiling fans. A simple digital hygrometer can help you monitor the humidity so you can make adjustments before it becomes a problem for your floors.
Creating a regular maintenance schedule
The most common causes of water damage are often small, slow leaks that go unnoticed for weeks or months. You can prevent these issues by creating a simple maintenance routine. Once a month, take a few minutes to inspect the areas around your home where water is used. Check under sinks, behind the toilet, and around the base of your dishwasher, refrigerator, and washing machine. Look for drips, water stains, or musty smells. Also, take a look at the hoses connected to your appliances to ensure they aren’t cracked or bulging. Catching a small issue early is always easier and less expensive than dealing with a major failure down the road.
Installing early warning systems
For an extra layer of security, consider installing water leak detectors. These small, affordable sensors can be placed in high-risk areas, such as in your laundry room, near the water heater, or under the kitchen sink. If they detect moisture, they’ll sound an alarm and can even send an alert directly to your smartphone, allowing you to act fast, even if you’re not home. For a low-tech solution, get into the habit of shutting off your home’s main water supply when you go on vacation. It’s a simple step that completely eliminates the risk of a plumbing failure while you’re away.
The value of professional inspections
Sometimes, moisture problems are hiding where you can’t see them—beneath your floorboards or inside your walls. That’s where a professional inspection can be invaluable. At SuperClean Restoration, we use specialized tools like moisture meters to detect hidden water that could lead to structural damage or mold growth. If you’ve recently had a minor leak or just have a nagging feeling that something isn’t right, a professional water damage inspection can provide definitive answers and peace of mind. An expert can assess the moisture content of your wood and subfloor, ensuring your home is truly dry and safe.
Making the Right Choice for Your Floors
After the initial shock of water damage, you’re faced with some big decisions about your hardwood floors. The path forward isn’t always clear, but understanding your options can help you feel more in control. The key is to assess the extent of the damage and decide whether a repair will suffice or if a full replacement is the smarter long-term investment. It’s also about knowing who to trust with the restoration and how to protect your floors from future incidents. Taking a methodical approach ensures you not only fix the current problem but also safeguard your home for years to come.
Guidelines for repairing vs. replacing
Deciding whether to repair or replace your water-damaged hardwood floors comes down to the severity of the damage. If you’ve caught a small leak quickly and only have minor staining or slight cupping, you might just need to sand and refinish the area. In some cases, a few warped boards can be replaced without tearing up the entire floor.
However, if the water sat for a long time or the damage is extensive, replacement is often the only real option. A major red flag is when floorboards are lifting several inches off the subfloor—a sign of severe buckling. At that point, the structural integrity of the wood is compromised. The best course of action is to remove the damaged flooring, thoroughly dry the subfloor, and install new boards.
How to choose a qualified expert
When dealing with water damage, hiring the right professional is critical. This isn’t a job for a general contractor; you need a specialist with experience in water mitigation. A qualified expert will use advanced equipment like moisture meters, air movers, and industrial-grade dehumidifiers to ensure every last bit of moisture is gone—even the moisture you can’t see.
Look for a company with IICRC (Institute of Inspection, Cleaning and Restoration Certification) credentials, as this is the industry standard for restoration. Check online reviews and ask for local references. In a humid climate like ours in Palm Beach County, you need a team that understands how to handle moisture properly. The right professional water damage restoration services don’t just fix the visible problem; they prevent long-term issues like mold growth and wood rot.
Maintenance tips after restoration
Once your floors are beautifully restored, you’ll want to keep them that way. A little proactive maintenance goes a long way in preventing future water damage. Start by placing high-quality mats at all entryways to catch water and dirt from shoes. It’s also a good idea to use area rugs in high-traffic zones or places prone to spills, like under a dining table.
Get into the habit of regularly checking for leaks around appliances like your dishwasher, refrigerator, and washing machine. A small, slow leak can cause significant damage over time. Finally, consider having the sealant on your floors reapplied every few years. A strong, intact finish is your wood’s first line of defense against moisture.
Long-term strategies for protection
Beyond day-to-day maintenance, a few long-term strategies can offer serious protection for your hardwood floors. If you’re installing new floors or refinishing existing ones, make sure a high-quality protective coating like polyurethane is applied. This creates a durable barrier that helps repel water, giving you more time to clean up spills before they soak in.
It’s also helpful to manage your home’s indoor humidity levels, especially during Florida’s muggy summers. Using a dehumidifier can prevent the subtle, slow damage caused by excess moisture in the air. Most importantly, always act with a sense of urgency. After any water event, from a burst pipe to a storm, assume there’s potential for damage and call for a professional inspection right away.
Related Articles
- Emergency Water Extraction: A Complete Guide | SuperClean Restoration Services
- Water Damage Repair Wellington: A Homeowner’s Guide | SuperClean Restoration Services
- Flood Restoration Guide: Steps to Recover From Water Damage | SuperClean Restoration Services
- Water Damage Restoration: The Homeowner’s Guide | SuperClean Restoration Services
Frequently Asked Questions
My floors look dry after I cleaned up the water. Am I safe from damage? A floor that feels dry to the touch can be misleading. Water is incredibly good at hiding, seeping deep into the wood planks and, more importantly, into the subfloor beneath. This hidden moisture is what leads to long-term problems like mold, wood rot, and warping that might not show up for weeks. A professional assessment using moisture meters is the only way to know for sure if the area is completely dry.
How do I know if I should try to fix the floor myself or call a professional? You can likely handle a very small, recent spill on your own if you clean it up immediately. However, you should call for professional help if the water has been sitting for more than a few hours, if you see any boards starting to warp or buckle, or if the affected area is large. A musty smell is another major red flag that signals it’s time to call an expert right away.
Is it really necessary to replace the whole floor if only a few boards are warped? It really depends on what’s happening beneath the surface. While replacing a few boards is sometimes possible, widespread warping often indicates that the subfloor is also wet. Simply placing new boards over a damp subfloor is a recipe for disaster, as it traps moisture and encourages mold growth and rot. A professional can determine the extent of the damage to help you make the smartest long-term decision.
How long does the professional drying process usually take? The timeline for drying hardwood floors properly can vary quite a bit. For a minor issue, it might take a few days of running specialized equipment. For more significant water damage, the process could take a week or even longer, especially if the subfloor is involved. The key is to be patient, as rushing the drying process can trap moisture and cause more damage later on.
Will my homeowner’s insurance cover the cost of restoration? Insurance coverage for water damage can be tricky and really depends on your specific policy and the source of the water. Generally, sudden and accidental events like a burst pipe are often covered, but gradual damage from a slow, unfixed leak might not be. The best first step is to document everything with photos and then contact your insurance agent immediately to understand your coverage and start the claims process.