Seeing black mold on your wall is like seeing a warning light on your car’s dashboard. It’s not the problem itself, but a symptom of a bigger issue—excess moisture. Simply cleaning the visible spot without fixing the underlying leak or humidity problem is a temporary fix at best. True black mold removal involves a two-part strategy: eliminating the current growth and cutting off its water source for good. In this article, we’ll guide you through both parts of the process. You’ll learn how to safely clean contaminated areas and, just as importantly, how to find and fix the moisture source to ensure the mold doesn’t come back.
Key Takeaways
- Solve the Water Problem First: Mold is a symptom of excess moisture. To ensure it doesn’t return, you must find and repair the root cause, whether it’s a hidden leak, poor ventilation, or high humidity.
- Protect Yourself and Your Home During Cleanup: Always wear proper safety gear like an N95 mask and gloves when handling mold. Isolate the contaminated area with plastic sheeting to prevent spores from spreading to other parts of your house.
- Recognize When a DIY Fix Isn’t Enough: If the mold covers more than 10 square feet, keeps coming back, or you suspect it’s in your HVAC system, calling a certified professional is the safest and most effective choice for your home and family.
What Is Black Mold and Why Is It a Problem?
Let’s clear the air about “black mold.” The term sounds alarming, but it usually refers to a species called Stachybotrys chartarum. While it gets a lot of attention, the color of mold isn’t as important as the fact that you have mold in the first place. Any type of mold in your home is a sign of a bigger issue: excess moisture. Black mold often shows up when there’s been a water problem, like a hidden leak or poor ventilation, creating the damp environment it needs to thrive.
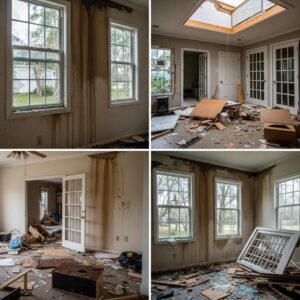
Think of mold as a symptom. It signals that part of your home is too wet, and that moisture can cause serious damage to whatever it touches. It can eat away at drywall, warp wooden studs, and ruin carpeting and insulation. The longer it sits, the more harm it can cause to your property’s structure and value. So, when you see black mold, your focus should be on two things: safely removing the mold itself and, just as importantly, finding and fixing the source of the moisture that allowed it to grow. Ignoring the root cause is like hitting the snooze button on a fire alarm—the problem will only get worse and lead to more complicated and costly repairs down the road.
The Health Risks of Black Mold
When it comes to health, mold affects everyone differently. For most healthy people, a small patch of mold might not cause any issues at all. However, for others, it can be a serious problem. People with mold allergies, asthma, or other respiratory conditions can experience symptoms like sneezing, coughing, and irritated eyes. The CDC also points out that individuals with compromised immune systems should be especially cautious and avoid cleaning mold themselves. It’s not just about the visible spores; mold releases microscopic particles into the air that can be inhaled, which is why addressing it properly is so important for maintaining healthy indoor air quality.
Where Black Mold Hides in Your Home
Mold is sneaky and loves to grow in dark, damp places you might not check very often. The most common hiding spots are areas with persistent moisture. Think about the spaces under your sinks in the kitchen and bathroom, where a slow drip from a pipe can go unnoticed for weeks. Other frequent culprits include poorly ventilated bathrooms where steam from the shower gets trapped, basements with condensation, and around leaky windows. In Florida, high humidity can make almost any poorly-circulated area a potential breeding ground, including closets, laundry rooms, and behind large furniture placed against exterior walls.
Know the Warning Signs
Your nose is often your best first defense against mold. A persistent musty, earthy smell is a classic red flag that you have a moisture problem, even if you can’t see any growth. Visually, you might spot black, green, or even white patches on walls, ceilings, or baseboards. Sometimes it just looks like a smudge of dirt that won’t wipe away. If you find mold, it’s crucial to clean it up quickly to prevent it from spreading and causing more damage. Pay close attention if the mold keeps coming back after you clean it; this usually means the moisture source hasn’t been fixed and the problem is deeper than what’s on the surface.
Prepare for a Safe Removal
Before you start scrubbing, it’s crucial to set up your workspace for safety. Disturbing mold can release millions of spores into the air, which can spread throughout your home and pose health risks. Taking the right precautions protects you and prevents the problem from getting worse. Think of it as setting up your battle station—proper preparation is half the fight. This is especially true in the humid climate of Palm Beach County, where mold can take hold quickly. Getting your safety and containment measures right from the start will make the entire process more effective and keep your family safe.
Gather Your Protective Gear
Your health comes first. Never attempt to clean mold without the right personal protective equipment (PPE). At a minimum, you’ll need an N95 respirator to protect your lungs from inhaling harmful spores. The CDC also recommends using a half-face or full-face respirator for larger jobs. You’ll also want safety goggles to shield your eyes, long rubber gloves to protect your hands, and old clothes or disposable coveralls that you can either wash in hot water or throw away immediately after you’re done. This isn’t the time to cut corners; proper gear is non-negotiable for a safe cleanup.
Ventilate the Area Properly
You need to control the airflow to prevent mold spores from becoming unwelcome guests in other parts of your house. Start by turning off your HVAC system completely—you don’t want your air conditioner or heater circulating spores. Next, seal off the contaminated room from the rest of your home using heavy plastic sheeting and painter’s tape over doorways and vents. Then, place a box fan or an exhaust fan in an open window, facing out, to pull contaminated air out of the room. This creates negative pressure and helps ensure the spores are vented directly outside instead of spreading indoors.
Your Tools and Materials Checklist
Having everything you need on hand before you start will make the process smoother and safer. Here’s a quick checklist of what to gather:
- Stiff-bristled brushes and sponges for scrubbing
- Spray bottles for your cleaning solution
- Buckets for clean water and your cleaning mix
- Heavy-duty trash bags for disposing of contaminated materials
- A wet/dry vacuum (if you have one) for cleaning up debris
- Your chosen cleaning solution, which could be a commercial mold remover, a bleach solution, or a simple mix of dish soap and water. Always read and follow the product’s instructions carefully.
How to Contain the Mold
Containment is key to stopping a small mold problem from turning into a whole-house issue. Beyond sealing doorways, you should also cover any nearby furniture or belongings with plastic sheeting. If the mold is on a movable object, take it outside to clean if possible. For mold on walls or floors, you can tape plastic sheeting directly over the affected area before you begin scrubbing to catch any falling debris. The goal is to create a fully isolated work zone. This simple step helps stop spores from spreading and makes the final cleanup much easier and more effective.
Your Step-by-Step Guide to Removing Black Mold
Once you’ve taken the proper safety precautions, you can start the removal process. Tackling black mold requires careful attention to detail, as cutting corners can lead to regrowth or spread the spores to other parts of your home. The right approach depends heavily on what kind of material you’re cleaning and the size of the problem. Remember, this guide is for small, manageable areas of mold. If you’re facing a large or widespread issue, your safest and most effective option is to call in a professional team. For smaller spots, follow these steps carefully to clean the area and protect your home.
Choose Your Cleaning Solution: Natural vs. Chemical
When you’re deciding what to clean with, you have a few options. For very small patches of mold on non-porous surfaces, a simple, natural solution can work. A mixture of white vinegar or baking soda with water can be effective for scrubbing away surface mold. However, it’s important to understand the limits of these DIY cleaners. The CDC’s mold clean up guidelines are clear that for larger areas or mold that has seeped into porous materials, a stronger approach is often required. While you might see commercial mold removers at the store, these can contain harsh chemicals, so always follow the manufacturer’s instructions and ensure the area is well-ventilated.
How to Clean Different Surfaces
The type of surface you’re cleaning will determine your method of attack. Mold behaves differently on a hard tile floor than it does on porous drywall, so you can’t treat them the same way.
Hard Surfaces and Tile
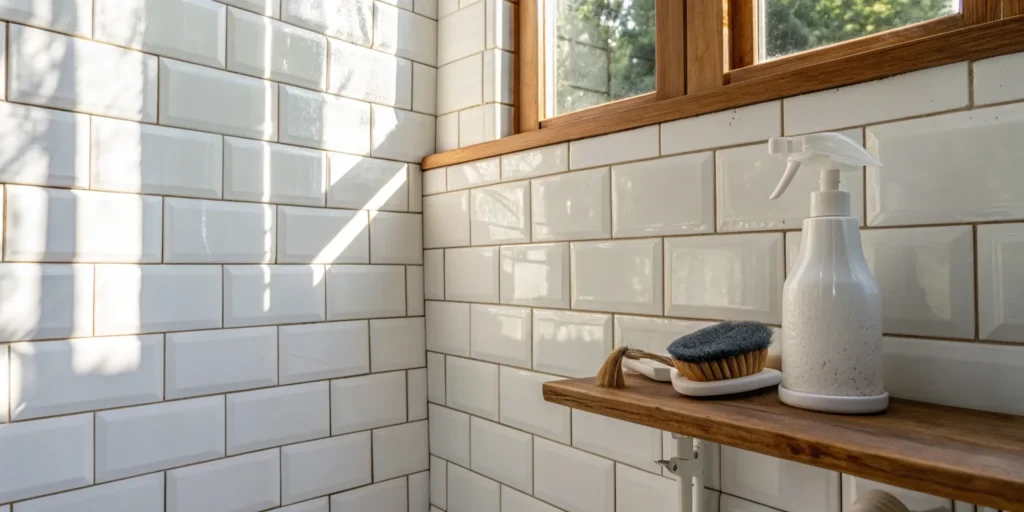
For non-porous surfaces like tile, glass, and sealed countertops, you can typically scrub the mold away. Use a brush or sponge with soap and water to thoroughly clean the area. The most important final step is to dry the surface completely. Any lingering moisture is an open invitation for the mold to come right back.
Drywall and Wood
Porous materials like drywall, unsealed wood, and carpet are much trickier. Mold doesn’t just sit on the surface; its roots, called hyphae, grow deep into the material. Because of this, surface cleaning is often not enough. In most cases, the best and safest solution is to cut out and replace the affected material entirely.
Fabric and Upholstery
If you find mold on curtains, furniture, or other fabrics, assess the damage. Some items may be salvageable with a deep cleaning, but others might need to be thrown out. When you clean, be sure to dispose of any sponges, rags, or brushes you use. Reusing them is a surefire way to spread mold spores to other areas of your home.
Dispose of Contaminated Materials Safely
Proper disposal is a critical step that many people overlook. Any materials that were removed, such as sections of drywall, carpet, or insulation, should be sealed in heavy-duty plastic bags before you carry them through your house. This prevents spores from becoming airborne and settling elsewhere. Check your local regulations for specific disposal guidelines for mold-contaminated materials. When in doubt, double-bag everything. Taking this extra precaution ensures that once the mold is out of your home, it stays out for good.
Mistakes to Avoid During Removal
One of the most common DIY mistakes is reaching for bleach. While bleach can kill surface mold and remove the stain, it doesn’t penetrate porous materials effectively, meaning the roots are often left behind to regrow. Even worse, bleach can be dangerous. You should never, ever mix bleach with other cleaners, especially ammonia, as it can create toxic chlorine gas. Stick to soap and water or a cleaner specifically designed for mold, and always prioritize safety by working in a well-ventilated space.
Know When to Call a Professional
While tackling a small spot of mold on your own can feel empowering, it’s crucial to recognize when a problem is beyond a DIY fix. Some situations are too large, complex, or hazardous to handle without professional equipment and expertise. Calling in a certified remediation specialist isn’t giving up; it’s making the smartest and safest choice for your home and your family’s health. Knowing your limits is key to ensuring the problem is solved completely and correctly.
Signs You Need an Expert
Sometimes, the scope of a mold problem makes professional help non-negotiable. According to the EPA, you should call an expert if the affected area is larger than 10 square feet (roughly a 3-foot by 3-foot patch). If mold keeps returning to the same spot after you’ve cleaned it, that’s a major red flag. It usually means there’s an underlying moisture issue you can’t see, like a hidden pipe leak. You should also leave it to the pros if you suspect mold is hiding in your HVAC system or if anyone in your household has asthma, allergies, or a compromised immune system. Their health isn’t worth the risk of a DIY project.
What to Expect from a Remediation Service
Hiring a professional service can feel intimidating, but a reputable company will guide you through a clear process. First, they’ll conduct a thorough inspection to identify the mold source and the full extent of the damage. Next, they will set up containment barriers to prevent spores from spreading to other areas of your home during removal. Using specialized equipment like HEPA vacuums and air scrubbers, the team will safely remove the mold-infested materials. Finally, they will address the moisture problem that caused the mold in the first place, ensuring it doesn’t come back. They should leave your home clean, dry, and safe.
How to Choose the Right Company
When your home’s health is on the line, you want to hire the right team for the job. Start by looking for a company with specific experience and certifications in mold remediation from a recognized organization. Always ask for proof of insurance and check recent customer reviews and references. A trustworthy company will provide a detailed, written estimate and a clear remediation plan before any work begins. For urgent issues, especially after a storm or major leak, a local company with a 24/7 emergency response can make all the difference in preventing further damage and restoring your peace of mind.
Prevent Mold from Returning
Getting rid of mold is a huge relief, but the job isn’t finished until you’ve taken steps to make sure it doesn’t come back. Prevention is all about controlling moisture and maintaining a clean, dry environment. Mold can’t grow without water, so cutting off its life source is the most effective strategy you can use. By making a few adjustments to your home and your routines, you can create a space where mold simply can’t thrive. It takes a little diligence, but it’s far easier than dealing with another round of cleanup. These proactive steps will help you protect your property and keep your home healthy for the long haul.
Find and Fix Leaks
Your number one priority is to find and eliminate the source of the moisture. Mold spores are everywhere, but they only become a problem when they find a damp spot to grow. A slow drip under the sink, a small crack in your roof, or a leaky window seal can provide the perfect breeding ground. You need to become a bit of a detective. Regularly check under sinks, around toilets and tubs, near windows, and in the attic for any signs of water. If you find a leak, get it fixed immediately. The CDC emphasizes that addressing the source of moisture is the most critical step in preventing mold’s return.
Control Your Home’s Humidity
Here in Florida, humidity is a constant battle, but it’s one you have to win to keep mold at bay. Mold thrives when indoor humidity is above 50%. You can buy an inexpensive hygrometer to monitor the levels in your home. To keep humidity down, use a dehumidifier in damp areas like basements or crawl spaces. Always run the exhaust fan in your bathroom during and after a shower, and use the one in your kitchen when you’re cooking. The EPA recommends using fans or opening a window to increase airflow in damp places, which helps moisture evaporate faster and keeps surfaces dry.
Improve Airflow and Ventilation
Stagnant, humid air is an open invitation for mold. Good ventilation keeps air circulating, which helps dry out any lingering moisture. You can improve airflow with a few simple habits. When the weather permits, open windows to let fresh air in. Use ceiling fans or portable fans to keep air moving, especially in rooms that feel stuffy. Make sure your furniture isn’t pushed right up against the walls, as this can trap moisture and block airflow. Also, check that your home’s air vents aren’t blocked by furniture or clutter. These small adjustments can make a big difference in creating an environment that’s less hospitable to mold.
Create a Regular Inspection Routine
Making mold prevention a part of your regular cleaning routine is the best way to stay ahead of any potential problems. Once a month, do a quick visual inspection of mold-prone areas: under sinks, in closets, around windows, and in the bathroom. Wipe down shower walls after use and clean up any spills or condensation right away. According to home improvement experts, you should regularly clean and disinfect areas that tend to get wet. By catching and cleaning small spots of moisture before they can become a problem, you can stop mold before it even has a chance to start growing.
Test and Monitor Your Home
Once you’ve cleaned up a mold problem, the job isn’t quite finished. The next, and arguably most important, phase is making sure it doesn’t come back. This means keeping a close eye on your home’s environment through consistent testing and monitoring. Think of it as shifting from a reactive cleanup to a proactive prevention plan. Staying on top of potential issues is the best way to keep your home healthy and safe for the long haul, giving you peace of mind after all your hard work. It’s about creating a new routine that protects your property and your family from future mold growth.
DIY vs. Professional Testing
You’ve probably seen DIY mold test kits at the hardware store, and they can seem like an easy first step. While these kits can confirm the presence of mold spores, they often can’t tell you the type of mold or the true scale of the infestation. For a small, visible patch, a DIY approach might give you a starting point. However, if you’re dealing with a larger issue, it’s best to get a professional opinion. The EPA’s guidelines recommend calling an expert if the moldy area is larger than 10 square feet or if there’s been significant water damage. A professional assessment will give you a complete picture of the situation, including hidden mold and air quality issues.
Check Your Air Quality
What’s in the air you breathe is just as important as what’s growing on your walls. Mold spores are microscopic and can easily become airborne, traveling throughout your home. Your HVAC system can be a major culprit in spreading them. If you even suspect that mold has gotten into your heating or air conditioning system, do not run it. Turning it on can circulate spores through every room, turning a contained problem into a whole-house issue. Because mold spores are a natural part of our environment, they only become a problem when they find a damp place to land and grow. That’s why a thorough mold removal process addresses both the visible growth and the airborne spores.
Develop a Long-Term Prevention Plan
The best way to deal with mold is to stop it from ever starting. A long-term prevention plan is your best defense, and it all comes down to controlling moisture. Make it a habit to use exhaust fans in bathrooms and kitchens to vent steam and humidity outside. In naturally damp areas like basements or laundry rooms, a dehumidifier can make a world of difference. You should also create a routine to regularly clean and disinfect areas that tend to get wet, like under sinks, around windows, and in the shower. These small, consistent actions are the key to keeping your home dry, healthy, and mold-free.
Restore Your Home After Mold Removal
Once the mold is gone, you can finally breathe a sigh of relief. But the work isn’t quite over. The final phase is all about restoring your space and taking smart steps to prevent mold from ever coming back. This is your chance to rebuild and create a healthier home environment for the long haul. It involves repairing any materials that were removed, dealing with insurance, and setting up new habits to keep your home dry and mold-free. Taking the time to do this right ensures all your hard work pays off.
Repairing Damaged Areas
After a thorough cleaning, you’ll need to assess the damage. Some materials just can’t be saved. Porous items like carpet, ceiling tiles, and drywall that have been affected by mold often need to be completely removed and replaced. According to the EPA’s official guidelines, mold can grow deep within these materials, making it nearly impossible to clean them completely. For non-porous surfaces, you might just need a fresh coat of paint with a mold-inhibiting primer. If the affected area was larger than 10 square feet, it’s always best to have a professional handle the repairs to ensure everything is restored safely and correctly.
Document Everything for Your Insurance Claim
Dealing with insurance can be a headache, but good documentation makes the process much smoother. Before you throw anything away or start repairs, take clear photos and videos of all the damage. Keep a detailed log of every step you took during the cleanup, including receipts for any supplies or professional services you used. This paper trail is your best tool when filing your claim. Having clear evidence of the extent of the mold problem and the necessary steps for remediation will help you justify the costs and get the coverage you’re entitled to.
How to Keep Your Home Mold-Free for Good
The best way to deal with mold is to make sure it never returns. It all comes down to moisture control. Start by fixing any leaks in your roof, pipes, or windows immediately. In damp areas like bathrooms and basements, use exhaust fans or open a window to improve airflow, especially after a shower. You can also control moisture levels throughout your home by using a dehumidifier. Make it a habit to regularly clean and disinfect areas that are prone to wetness. A little ongoing maintenance goes a long way in keeping your home healthy and preventing future mold growth.
Related Articles
- Emergency Mold Remediation: A Guide for Palm Beach | SuperClean Restoration Services
- Mold Removal Services: What Homeowners Should Know | SuperClean Restoration Services
- What Mold Remediation Equipment Do Professionals Use? | SuperClean Restoration Services
Frequently Asked Questions
Is all black-colored mold the dangerous “black mold”? Not necessarily. Many types of mold can appear black, and the color alone doesn’t tell you what you’re dealing with. While some molds are more concerning than others, any type of mold in your home is a sign of a moisture problem that needs to be addressed. Instead of getting caught up on the color, focus on safely removing the growth and fixing the leak or humidity issue that caused it.
Can I just paint over a small patch of mold? This is a tempting shortcut, but it’s one you should definitely avoid. Painting over mold doesn’t kill it or solve the problem. The mold will continue to grow and feed on the material underneath the paint, leading to more significant damage over time. You have to completely remove the mold and fix the moisture source before you can begin to repair and repaint the area.
I cleaned the mold, but the musty smell is still there. What does that mean? That lingering musty odor is a big clue that the problem isn’t fully solved. It usually means there’s more mold hiding in a place you can’t see, like behind a wall, under flooring, or in your ventilation system. The smell is a direct result of the mold’s presence, so if you can still smell it, there’s still mold somewhere. This is a good time to consider a professional inspection to find the hidden source.
How can I tell if mold is hiding in my walls or HVAC system? Finding hidden mold can be tricky, but there are a few telltale signs. Look for peeling, bubbling, or discolored areas on your walls or ceiling, which can indicate moisture is trapped behind them. A musty smell that gets stronger when your air conditioning or heat turns on is another major red flag for mold in your HVAC system. If you suspect this is the case, stop using the system immediately and call for a professional inspection to avoid spreading spores throughout your home.
My home insurance says they don’t cover mold. What should I do? This is a common and frustrating situation. While many standard policies have limitations on mold coverage, there are exceptions. If the mold was the direct result of a covered event, like a sudden pipe burst or storm damage, the removal may be included as part of that claim. The best thing you can do is carefully review your policy and document everything with photos and detailed notes before, during, and after the cleanup.